Oil Filter Inspection
Don't pay someone else. Here's how to do the filter inspection yourself!
Routine oil filter inspections are a useful tool in the aircraft owner’s diagnostic toolbox. We use spectrometers to test for metals on a microscopic level, smaller than you can see and smaller than an engine’s oil filter will remove from the oil. Larger pieces of metal that might not show up in spectral testing will be trapped in the oil filter. By checking the filter at each oil change, you’ll get a good idea of what normal is for your engine and be able to quickly identify any changes that might be the early signs of a problem.
Cutting the housing
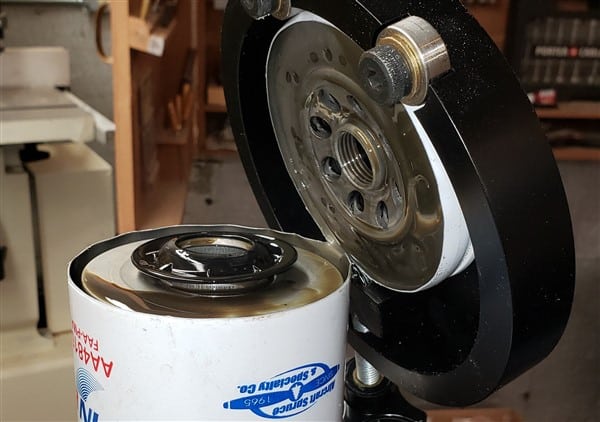
In order to inspect the filter pleats, they must first be removed from the housing. While a hacksaw or angle grinder might get you there, we strongly recommend using a filter cutter to remove the lid of the filter housing. A filter cutter cleanly cuts the robust steel housing without producing metal shavings that might find their way onto the filter pleats you are about to examine. Plus, who doesn’t like a good specialty tool?
The AFC-470 from Airwolf Filter Corp is our go-to cutter here at the lab: http://www.airwolf.com/aw/products/oil-filter-cutter. This tool fits the filter from any Lycoming or Continental engine we’ve come across. Airwolf also offers a smaller cutter for Rotax engine filters. For those who might also want to examine filters from other engines, like their car or truck, filter cutters that cover a wider range of filter sizes are available from speed shops such as Summit Racing. (https://www.summitracing.com/parts/sum-900511)
- Secure the filter lug in a bench vice. If the filter doesn’t have a lug, you can secure the lower section of the filter housing in the vice – just be careful to not crush the housing or it may trap the internal cartridge with the filter pleats. Poking a hole in the housing to allow oil to drain can also trap the internal cartridge, so we recommend avoiding that as well.
- Place the filter cutter on the filter and gently tighten the cutting wheel. We like to take a conservative approach in cutting the housing, progressively tightening the cutting wheel over a few rotations, rather than trying to cut through in one pass.
- Once the lid has been cut, the cartridge with pleats can be removed from the housing. It is also good to inspect the inside of the filter housing for metallic particles and other debris that may not be trapped in the filter pleats.
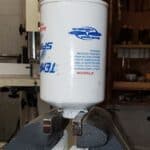
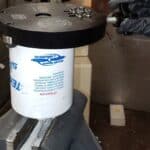
Removing pleats from the cartridge
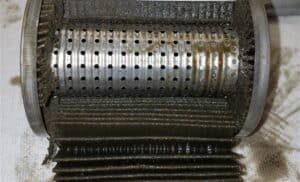
You have two options at this point. You can use a solvent such as mineral spirits to wash debris from the pleats, leaving the cartridge assembly intact. The resulting solvent/debris slurry is then filtered for examination. In our experience, this flushing method may not always remove all of the debris from the filter pleats. We prefer to cut the filter pleats from the cartridge for examination by the following method.
Disclaimer: There is the potential to guillotine a finger or two during this process. Proper technique greatly reduces the chances of extensive cursing and an unplanned trip to the local emergency room.
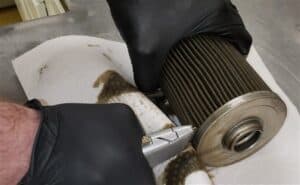
- Place the filter cartridge horizontally on the bench and hold with your non-dominant hand. Locate the filter pleat seam that adjoins the two ends, usually with a metal band or glue.
- Hold the knife with your knuckles against the bench for stability. Starting at the seam and using only downward force, cut along the edge of the pleats opposite the side you are holding. We prefer to rotate the pleats into the knife blade, firmly holding the knife in a fixed position. This method, when done properly, protects your off-hand’s fingers from the knife blade, where the knife moves downward into the bench if it were to slip.
- Flip the cartridge around and repeat steps 1-3 on the other side. You may have to make a few passes on each side to fully cut the pleats. Using a new razor blade helps.
- Again locate the seam where the two ends of the filter pleats are joined together. Cut across the pleats on either side of the seam.
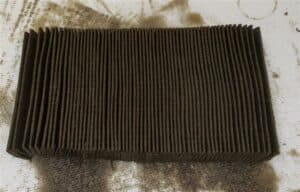
- The pleats can now be removed for examination. If properly cut, the pleats will come out in one long piece with a clean edge on both sides.
- The pleats will still contain a fair amount of oil at this point, making it difficult to see metallic debris. If time allows, you can place the pleats on paper towels to drain overnight. You can also squeeze the pleats like an accordion and mop up the oil that squeezes out with paper towels.
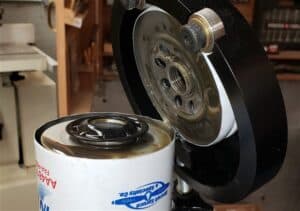
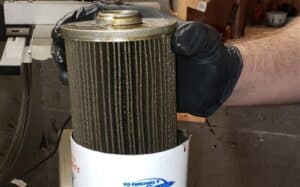
Inspecting the pleats and basic identification of common particles
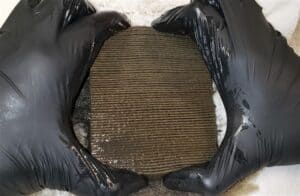
Stretch the pleats out under a bright light or outside on a sunny day. Larger metal slivers will be obvious, but you may have to look quite closely to identify smaller particles. Here at the lab, we have a dedicated space with clamps that stretch the filter pleats out in one long section. You can improvise in the shop by placing something heavy on both ends of the pleats.
- A strong magnet (covered with a plastic baggie or cling wrap) will remove ferrous particles from the pleats. We also suggest checking the pleats themselves with a magnet. Severe steel wear may generate enough small ferrous particles to make the pleats react to magnet.
- Aluminum has a bright, silver appearance and will not react to a magnet.
- Copper-containing alloys, such as brass or bronze, vary from a light straw to copper color and will not react to a magnet.
- It is also common to find carbon, especially in the filters from turbocharged engines. Carbon is black, hard particles that can be broken apart between your fingers. A large amount of carbon might indicate excess blow-by, but what counts as excessive is unique to each engine. Regularly checking the oil filter will give you a good idea of how much carbon is normal for your engine. You might also find carbon with steel embedded in it, so it is good to check carbon particles with a magnet.
- Small bits of sealer material may also be found, especially after repairs. We generally don’t worry about this sort of non-metallic debris.
- You might also find lead deposits from fuel blow-by. These particles have a bright, foil-like appearance that can look very much like a metallic wear particle. These deposits can be distinguished from metallic wear by their soft and “smudgy” texture. It is worth mentioning that these deposits are not lead from the wearing surface of a crank or camshaft bearing.

Steel sliver
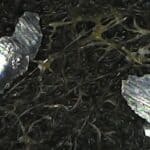
Aluminum flakes under magnification
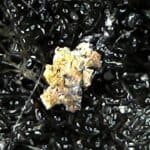
Brass/bronze under magnification
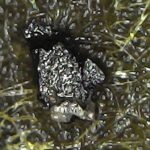
Carbon deposit
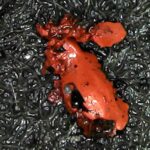
Sealer material
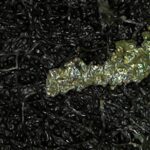
Lead deposit
Evaluating Filter Debris/Conclusion
In some cases, a filter will contain so much metal that a looming problem is almost certain. But it is more often the case for the findings to land in an ambiguous gray area, where the severity of the metal is situationally dependent. You can expect to find some metal and other debris in the filter from a fresh overhaul, for example, where the same findings would be unusual in a routine filter inspection for that same engine at 500 hours since major.
Lycoming offers good guidance on the identification and evaluation of filter debris in Service Bulletin 480F. In our opinion, a lot of the information in that bulletin can also be applied to Continental engines. Blackstone also offers a filter and filter screen examination service as a compliment to oil analysis – but we recommend doing routine filter screenings yourself to get familiar with what’s normal for your particular engine. Save your money for flying — check your filter yourself!
Further Reading
https://www.lycoming.com/content/suggestions-if-metal-found-screens-or-filter
Related articles
EGT Myths Debunked
Concerned about EGTs? Maybe you don't need to be
Critical Component Failures
What you need to know about aircraft engine failure points
Aircraft Oil: Go Ashless or Go to the Repair Shop
Ashless dispersant oil really does matter!
Fuel Contamination in Aircraft
Is fuel contamination in aircraft oil a problem?


