Insolubles in Aircraft Oil

Once upon a time I lived in primitive conditions as a soldier in a war zone. We had few amenities, eating our three daily meals from a can. The morning coffee routine wasn’t very refined, either. The cooks worked in a tent. They heated water for coffee in large 15-gallon pans over a gasoline-fired stove. To make coffee they simply dumped tins of ground coffee beans into the boiling water, and after it steeped for a while, the water turned brown. When it appeared to be the right color, the heat was turned down and the churning grounds—at least most of them—settled to the bottom. If you were early when you passed through the chow line, you got a top-of-the-brew serving that wasn’t bad. If you were late and your cuppa joe came from somewhere near the bottom, you could chew it.

We enjoyed the coffee grounds in our coffee as much as your engine enjoys insoluble materials in its oil. These days, there’s usually only one reason I find grounds in my coffee: the coffee filter failed for one reason or another. Usually, one or more of the filter pleats has laid down, letting grounds overflow the rim. But the insolubles in your aircraft’s oil are not quite as simple as the grounds in my Mr. Coffee machine. There are many reasons that insolubles form in an aircraft oil sample.

What are insolubles?

Insolubles are the total solids we find in an oil sample. Insolubles are often caused by oxidation, which is a natural process that occurs when oil is exposed to heat or oxygen (in the air). Oxidation leaves free carbon in the oil when the oxygen molecules combine with hydrogen.

Virgin oil usually doesn’t have any insoluble materials in it. When it occasionally does, the most we normally find is a trace level. The insolubles in virgin oil are from the normal oxidation process of the oil.

At least some of the insolubles in the oil samples we analyze are free carbon particles, which are hard particles that can damage sensitive, close tolerance parts like friction bearings. Keeping insolubles within the normal range is important to most aircraft engine operators wishing to get the longest life possible from their engines.

Measuring insolubles

There are various methods of measuring insolubles in the oil. One is to draw the oil through a very fine filter (½ micron) and then weigh the filter. The filter’s weight gain is reported as a percentage of insoluble materials by weight, compared to the weight of the sample that was drawn through the filter. Another measuring method rates the darkness of the filter patch compared to a standard.

The insolubles test we use at Blackstone is a centrifuge method. A measured volume of oil is mixed with a heated solvent, agitated, and spun at high speed. Insoluble materials collect at the bottom of a tapered glass tube and can then be measured as a percentage of the sample by volume.

We like to see insolubles in piston aircraft engines at or below 0.5 or 0.6% of the sample, depending on the type of engine. Some engines run cleaner than others, so the acceptable range can vary.

As engines age, insolubles in the oil tend to increase. You may think, judging from the gray appearance of used aircraft engine oils, that the insoluble level would be quite high. Actually, the grayness of these samples is from lead in the oil, which easily falls out of suspension in the oil and forms insolubles. Blow-by, fuel system problems, and combustion problems will cause the oil to be black rather than gray. If you observe black oil when you collect the sample, you may have a problem that needs investigating.

Why do I have high insolubles?

The insolubles test is a good measure of how fast the oil is oxidizing and receiving contaminants from blow-by or other engine systems, and how effectively the system’s oil filtration is functioning. Any contaminant in the oil will accelerate its tendency to oxidize, so the insolubles test is a good crosscheck when we suspect a contaminant like gas, moisture, or excessive blow-by. Excessive metals in an oil will also increase the oxidation process. So will frequent and/or extreme heat cycles.

If we found high insolubles but no contamination from fuel or blow-by in your oil, and your oil change intervals are normal, we might mention a problem at oil filtration as a possible cause of the insolubles. The oil filter bypass valve may relieve if the filter was becoming restricted. The filter system bypass could also open upon cold starts when the oil is too thick to pass through the filter media, which may be partially restricted. Once the bypass relieves, the filter is effectively out of the system. Insolubles may also be forming because your oil use interval is too long, and the filter can’t keep up.

Insolubles are just one of the tests we provide to determine the condition of your piston aircraft engines and used oils. It’s an important test that helps us gauge the condition of your oil and engine, and helps keep you flying happily for many hours to come!

By |2024-09-18T14:05:35-04:00July 18, 2023|Aircraft, Articles|Comments Off on Insolubles in Aircraft Oil

How Often Should I Change My Oil?

When it comes to the questions we get here at the lab every day, right up there with “What kind of oil should I use?” is “How often should I change my oil?” Continental and Lycoming both have guidelines in place, and generally speaking it’s 50 hours for those with spin-on filters and 25 hours for engines equipped with oil screens. But as you know, way more than calendar time should go into determining how often you should be changing your oil. There’s not just one answer for everyone. The engine manufacturer’s guidelines are better than nothing, but there’s also oil analysis. Guess which method we like best for determining how often you should change the oil?

Inactivity

One of the biggest factors we use in determining how often to change your oil is how active the engine is. We used to say you need to fly ten hours a month to keep corrosion away, but a few years back we realized that people were doing fewer hours than that and still getting decent wear numbers. So we lowered our general threshold to five hours of flying a month as what we consider “active” for an aircraft engine.

The problem is, a lot of people don’t like to admit their beloved aircraft has been inactive. But it’s okay to admit it. We can almost always tell. We even have a little question on the back of the oil slip that says “Any inactivity or problems/suspicions?” Inevitably, someone will pen a big NO in that space when in reality, he or she let the plane sit for eight months, then flew it 10 hours in the span of a month. “No!” they protest. “It hasn’t been inactive! I flew 10 hours this month!”

Inactivity usually shows up as aluminum and iron, from oxides and wear at the pistons and cylinders, though other metals can show up too. Trust me, it’s okay to admit when your engine has been inactive. That’s generally an easier and more fun problem to have than a bona fide mechanical issue. When we suspect corrosion, we almost always recommend cutting back to a shorter oil change. While changing the oil more often doesn’t prevent corrosion from happening, it does allow you to 1) monitor the corrosion to make sure it’s not getting out of hand, and 2) get the metal-laden oil out of the system sooner, so not as much metal gets washed into the oil when you crank over the engine. Abrasive oil causes more wear. Even if you have to change the oil with just two or three hours on it, that’s fine. We’d much rather see that than a fill that sat a year, accumulated 20 hours, and was full of metal.

Metal

Of course, as an oil analysis lab we also look at how much metal your engine is producing. If you’ve seen our reports, you know that we keep a database of all the engines we’ve ever seen. We average their wear and then compare that to your own sample to see what’s reading high, what’s normal, and what’s better than most. We like it when you send along notes. The more you tell us about what’s been happening with the engine lately or any specific conditions that might affect the sample, the better our comments on your sample will be.

An engine that’s making more metal than average will usually need more frequent oil changes. That doesn’t fix a problem, if one exists, but it does help you to monitor it more closely and get the abrasive oil out of the system sooner rather than later.

Contaminants

The main contaminants in aircraft engine samples are fuel, water, and blow-by. Blow-by is hard to avoid ¾ all engines blow by to some extent. You want to see lead holding steady from sample to sample. If it’s increasing, we’ll often recommend shorter oil changes until you can figure out what’s going on.

Water can enter the system just from condensation in the air, though we don’t usually see more than a trace from that. And traces of moisture, while not ideal, probably aren’t going to hurt too much. They might accelerate corrosion if you’re not flying all that much, but usually a trace of moisture won’t cause too many problems. When more than a trace of water is showing up, and it’s showing up in every sample, it can be a sign of something else going on. Often, an incorrectly set-up air/oil separator will cause moisture in the oil. When we’re consistently seeing more water than normal, we’ll often recommend going to a shorter oil change.

Fuel is also a common find in aircraft samples. We recommend taking the sample hot to eliminate any normal traces of fuel and moisture, but sometimes people have to take a cold sample, which results in fuel. And that’s okay. As long as you tell us about it, we’ll take that into account when we write the comments and we probably would not recommend using a shorter oil change just for traces of fuel. You can also get fuel in the oil from excessive priming, and again, as long as it’s not showing up in every sample, this is usually something that does not affect wear and will clear up next time. If, however, we’re seeing a lot of fuel from sample to sample, it can be a sign of something else going on so we would likely recommend a shorter oil change until you can figure out what’s up.

Environment

Where you fly also affects how often you need to change your oil. Inactive engines in a dry place like Arizona can usually get away with keeping the oil in place longer than someone in Michigan or North Carolina. In fact, humidity can cause us to alter our standard less-than-5-hours-is-inactive rule. Someone in Georgia may be flying 8 to 10 hours a month and still getting signs of corrosion and need to change more often than someone with the same engine near a desert.

Acids

There’s a lot of talk out there about needing to change the oil more often due to acid build-up in the oil, and we’d say that’s a load of hogwash. In fact we did an article on that topic for our last newsletter. Basically we ran total acid tests on a whole slew of aircraft samples and only three out of 63 samples had a TAN (Total Acid Number) over 2.0. And 2.0 is still a low reading ¾ we consider anything above ~4.0 to be acidic. Never say never, but I predict pigs will be flying before we’ll tell you to change your aircraft oil because it’s getting too acidic.

What about the oil?

Notice what we have not said we take into account: the brand you’re using and whether it’s straight-weight or multi-grade oil. When Jim started this company back in 1985 he came up with a line he liked to use: Oil is oil. We still stand by that today. The oil guys would have you believe otherwise, but brand really does not seem to make a difference in how your engine wears, or how often you can change your oil.

Well, okay, if you’re using Joe Bob’s Oil that he “recycled” in the back of the hangar from emptied-out oil pans that he filtered with a piece of cheesecloth, we might say in that case brand does matter. But as long as you’re using an aircraft-certified aircraft oil, your engine probably isn’t going to care what you use. We like straight weights and we like multi-grade oils. In the end, what you use and how often you change your oil is completely your choice. We’ll give you our recommendation and you can do whatever you want with it. If you want to run longer on the oil despite having high wear, that’s totally fine. And if you have great numbers and you really like changing the oil often, we’re not going to send out the Blackstone henchmen to tell you to start running longer. Keep your own situation in mind and make your informed decision based on what’s showing up in the oil and filter/screen, what the engine monitors are telling you, and your own comfort level. It’s your airplane and your money!

By |2024-09-18T14:06:58-04:00July 18, 2023|Aircraft, Articles|Comments Off on How Often Should I Change My Oil?

The Acidity Question

Every now and then you hear about oil becoming acidic and causing internal corrosion in an aircraft engine. Usually that goes along with the oil absorbing water and then forming acids, but I’ve always disagreed with this statement.

It’s a well-known fact that corrosion is a problem for a lot of aircraft engines that don’t see much use, but is it really acidic oil that’s causing the corrosion, or simply bare metal parts being exposed to the atmosphere? So I decided to run some testing to see what I could find about acidity and aircraft oils.

Now, think back to high school chemistry. Remember learning about acids and bases? Normally with something like water, you measure the pH to determine how acidic or basic a liquid might be. A pH of 7 is neutral, lower than 7 is acidic, while higher than 7 is basic.

The problem with oil is, you can’t run a pH on it directly. So instead, we have the Total Base Number (TBN) and Total Acid Number (TAN) tests.

These are fairly simple tests and the basic principle is this. After you mix a measured amount of oil with some chemicals, you can run a pH on those chemicals. But that doesn’t equate to the TBN or TAN.

To get the TBN you add acid to the chemical mixture until it reaches a pH of 4. To get the TAN, you add a base to the mixture (in this case, potassium hydroxide) until the pH reaches 10. (You might wonder why we don’t just report the pH of the chemical mixture and have that be the end of it, and the answer to that is unknown, at least to me.)

The TBN test

The TBN test is commonly done on automotive oils, but not aircraft oil. That’s because the TBN always reads 0 or close to it with aircraft oil.

Automotive oil has a lot of additive packed in there and that is what the TBN reading is based on. That additive makes the TBN increase. Oil salesmen use the TBN test to help sell their oil, with the idea being that the higher the TBN, the better the oil. But the TBN is really just a testament to how much additive the oil starts with, not necessarily how well the oil will work in any given engine.

You might wonder why aircraft oil doesn’t use the same additives? It’s because the additives used in automotive oils aren’t ashless. The additives present in all aircraft oils have to be ashless, meaning when the oil burns nothing is left. This is why it’s a bad idea to use anything other than aircraft oil in your aircraft engine.

The TAN test

The TAN test is commonly done on industrial oil like hydraulic fluid. There is a theory that when oil becomes acidic it will accelerate wear and cause all kinds of problems, but that’s just a theory — and a pretty weak one in my book.

When most people think of acid, they might think of something like acid reflux and heartburn. Or maybe sulfuric acid burning a hole in their clothes, but that gives acids a bad rap. If it weren’t for acid, your food wouldn’t get digested and we’d be without a lot of very important chemical compounds. What’s more, there is no known correlation between acidic oil and higher wear that I know of.

It is commonly talked about that water in oil will cause it to become acidic, and maybe it will if the water has something to react to. But with aircraft oil, it doesn’t. The additives present aren’t sulfur-based like they are with automotive oils, so when water gets into oil, it usually just stays there until the oil gets hot enough to cook it back out.

Testing the theory

So for this newsletter article, I decided to run some TAN tests on various aircraft oils and see what shows up. Virgin aircraft oils usually have a TAN in the range of 0.4 to 0.8. It’s important to know where the TAN starts out, so you know how acidic the oil has become after use. (You’d think that oil starts out with a TAN of 0.0, but usually it does not.)

For the used oil data, we tested the TAN on 63 random aircraft samples.

Acid Chart

The average TAN reading for those samples was 1.3. That might seem like a fairly large increase, but in the oil analysis world, 1.3 is considered a low acidity reading for any type of system. A reading of 3.0 shows some acidity and anything over 4.0 can be considered fairly acidic.

The highest TAN reading we found was 2.3, but in our testing any readings over 2.0 were rare. In fact, only three samples read higher than 2.0 and none of those had water present, but two were considered inactive. Five of the samples we tested did have a trace of water present, but their average TAN was just 1.1, so we didn’t find any correlation between water and a high TAN.

Acid Chart 2

So how about inactive engines? Two samples that were inactive did have a TAN of over 2.0, but they were the exception, not the rule. We had 11 samples in our test run that were considered inactive, but the average TAN of those was just 1.2.

Based on this testing, it doesn’t look like oil acidity is really a factor at all. Does that mean you shouldn’t worry about inactivity? No — we’ve seen too many examples of poor wear from inactive engines to say that’s not a problem. What it does mean is that in our opinion you don’t need to worry about your oil being acidic. And in life, one less thing to worry about is a good thing!

By |2024-09-18T14:08:24-04:00July 18, 2023|Aircraft, Articles, Gas/Diesel Engine, Marine|Comments Off on The Acidity Question

Building an RV-12 (Part 3)

Since my last newsletter about building the Van’s RV-12, my wife and I have made quite a bit of progress. In fact, we’re nearly done. I believe the phrase commonly used in the homebuilt industry is “90% complete, 90% left to go.” But really, we’re getting down to the short strokes though it’s been a long process since we are mainly only able to work on it over the weekends.

Rapid progress…at first

When we started working, the plane was in a garage in Ossian, Indiana, about 15 miles south of Fort Wayne. The tail and wings were mostly done and the fuselage kit (the third of six kits total) was about one-sixth finished. After buying some videos on how to build the RV-12, we got started. I was actually blessed with a whole garage to work in (many thanks to my step-mother Kathy), and plenty of table space. We were also able to bring some parts home to work on in my basement, which was a nice help.
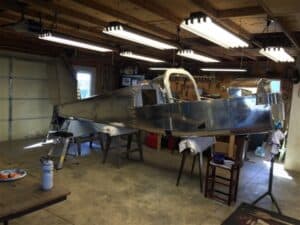
Progress proceeded rapidly when we started in June 2016. The side and bottom skins of the fuselage were installed that summer, and the basic fuselage structure was pretty well completed by November 2016, just in time to crack into the fourth kit, known as the finishing kit.

This name is a bit misleading because we were nowhere near finishing at this point, but that name has a better ring to it than “halfway kit,” or “other stuff you’ll need kit.” Actually, once that kit was done we were getting close to being finished, and by close, I still mean at least a year away at our pace. This kit included parts like the landing gear, canopy, cowling, and control cables.

The finishing kit

The first section of the finishing kit was wing installation, which was exciting. It’s starting to look a little more like an airplane. At that point, we didn’t have the tail on yet and that was by design. It’s a lot easier to walk around the thing without a tail in the way and it didn’t need the tail on until later, when we started stringing the controls for the rudder and horizontal stabilator. I picked up the suggestion while attending a forum at Oshkosh and also learned there that it wasn’t really necessary to complete the sections in order. Things like the rear window installation could be completed after we installed the wiring in the tail section and fuel tank.
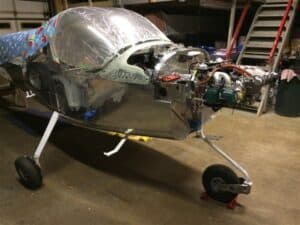
The tail was attached shortly after the wings in April of 2017, and the vertical stabilizer and rudder followed shortly afterwards. Next we attacked the bubble canopy, which on an RV-12 hinges forward — similar to what you might find on a Diamond. This task required our first attempt at fiberglass work. You might not think that would be necessary on an aluminum airplane, but it was and it wasn’t the last of the fiberglass work either. The EAA offers training courses for homebuilders on things like sheet metal, fiberglass lay-ups, and electrical wiring to name a few, and I’d highly recommend taking those if you’ve got your sights set on building your own plane.

Installing the landing gear

By the end of 2017, the canopy was on and we were ready to install the landing gear, and this is when we started to outgrow the garage. The problem was that I couldn’t have the vertical stabilizer on and the canopy open with the landing gear on or the canopy would have hit the ceiling. Those items were temporarily removed so we could proceed building, though it became obvious that we would need to move to a larger location soon.

Soon we were on to the avionics, so we still had a lot of work we could do in the garage without a canopy. For the RV-12, Van’s offered two choices of avionics suppliers: Garmin and Avidyne.

We talked with both at Oshkosh, and not seeing a major difference between the two, we chose Garmin due to the fact that I have been flying behind the G1000 for a while now and was pretty comfortable with it. Other than having to do some minor body contortions to get all the wiring installed, that part went fairly smoothly and before long it was time to move.

At this point, most people would head to the airport and work at a hangar, but fortunately, Blackstone has a large heated garage with a high ceiling, so I gave up my parking space in that garage and moved the plane there, as well as my work tables in preparation for the final kit — the engine.

Engine installation

Unlike a lot of other kits available, there was only one choice for engines from Van’s and that was the Rotax 912 ULS. The good news is that this is an excellent choice. We see a lot of samples from that engine and they virtually always look great. The big difference between this and other 100 HP selections is that it has liquid-cooled cylinder heads. With that present, it can run either unleaded fuel or leaded fuel, so now I have the option of buying my own fuel instead of always having to buy airport fuel.

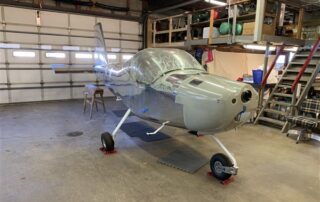
The engine is also equipped with altitude-compensating carburetors, so no mixture adjustments are necessary; one less thing for the pilot to worry about.

The engine was hung on December 21, 2018, a banner day in any airplane’s life. Everyone was excited, things are coming together, we’ll be in the air in no time now.

Well, here it is six months later and we still aren’t ready to fly, but as I said at the start of this article we are getting close. We flipped the master switch last weekend and powered up the avionics for the first time. Nothing caught on fire and the Garmin GX3 started just like it should, so that was another step in the right direction. We’ve rented a hangar at Fort Wayne International and will move it there at the end of the month. From there we’ll install the prop and start the test-flying process.

Time invested

I get asked occasionally how many hours we have in it and I really don’t know. Seems like keeping track of that would just make you depressed. With a project like this you have to just keep plugging away and sooner or later, the end will happen. In our case it’s been later, but the project has been fun and I’m glad my wife and I took it on. Still, I don’t think I’ll tackle another one any time soon. I’ll report back next newsletter, once we’re in the air!

By |2024-09-18T14:08:56-04:00July 18, 2023|Aircraft, Articles|Comments Off on Building an RV-12 (Part 3)

Building an RV-12 (Part 2)

I have been a pilot since 2005, and while I have done a fair amount of flying since that time, I have always rented the planes I have flown. This has both advantages and disadvantages, but for me the advantages have always been greater. Since earning my license, I have never really had any place I needed to fly. I have taken trips to see my in-laws around the Chicago area. I have picked up my Mom from various business trips that she’s taken, and I’ve done a few business flights, but none of these things were consistent enough need to warrant my own plane.

The ownership dream

It’s not that I haven’t been tempted, mind you. Like most pilots, I have my favorite aircraft (Republic SeaBee, Lake LA-4, Cessna Skymaster, to name a few) and have often dreamed of driving to the airport, opening up the hangar, and seeing my own aircraft sitting right there just waiting to be fired up. Having a window in my office doesn’t help either. Looking out on a nice sunny day, I feel a strong pull to stop when I’m doing, head to the airport, and take off, knowing that my airplane will be ready to go. However, obligations to family and business have kept those dreams at bay.

It helps that I can rent possibly the nicest Cessna 172SP in the tri-state area virtually anytime I like, so I can satisfy my flying itch when it needs scratching. I can also say that I have really appreciated not having to deal with the hassles that inevitably go along with ownership, like oil changes, annuals, and the guilt I’d feel when I go three to four months between flying.

Working in the oil analysis business, I can see the problems that develop in aircraft engines when they aren’t flown enough. Still, when you rent an aircraft, you never really know it like you would as an owner. All the little quirks that might identify a particular airplane are lost on me and if something changes in the one I fly, I don’t know if it’s a normal occurrence or possibly a problem.

Enter the RV-12

All of this changed with the unfortunate passing of my father Jim Stark back in November. He was assembling a Van’s RV-12 kit plane at the time of his death. It was always his dream to build an airplane, but until he retired and moved to a different house where he actually had some room to work, building an airplane was never in the cards.

I was the prime motivator in getting him working on an airplane, though I was never really interested in building one myself. If I were to ever get a plane, I would just bite the bullet and buy one, skipping all of the time it takes to assemble once, which can easily stretch out into a multiple-year endeavor. However, when Dad died I suddenly found myself with a half-finished airplane and a bunch of tools I don’t know how to use. So after some discussion with my wife, we decided to jump in and start building.

One of the big factors in this decision was how fun the RV-12 is to fly. I took a demo flight at Oshkosh last summer and decided that this was a plane I could easily get used to. The only downfall was that it only had two seats, so I couldn’t take my wife and kids anywhere at the same time. But I could see that this was a good introduction to aircraft ownership and also fun to build.

The up-side to building your own plane is you will know exactly how it all goes together and you can also do all of your own maintenance, which can be a big time- and money-saver down the road. Plus, depending on how the building goes, I could make a 4-seat RV-10 my next project and then I’d have something the whole family could take somewhere. But that’s getting ahead of myself.

Attacking the learning curve

I have what I consider to be a fairly strong mechanical background, but I’ve never done anything on an aircraft other than fly it. So far, building the RV-12 has been an adventure. The laboratory business is all metric, but I quickly learned that the metric system has no place in the aircraft industry. In fact, in some areas like drill bits, they don’t even use standard measurements, so buying my drill bits at the hardware store is out.

It also appears that deburring parts will be a large part of my life for the next few years. Fortunately my wife is ready and willing to help and will probably be the driving force in getting this project done. Deburring parts is a good place to start, at least until she is strong enough to run the rivet gun (better start hitting the gym, baby!).

its (a tool box and a section of wing), so I bought those and have been trying my hand at running a rivet gun. The results weren’t pretty, but I keep saying to myself that I’ll be more careful when it comes time to actually work on the plane. At least I hope I will.

I also bought a set of DVDs that show exactly how to build the RV-12 step by step. I know this is something Dad wouldn’t have approved of (he never met a set of instructions he didn’t throw away), but I don’t have the advantage of having an A&P license like he did, so I’ll take any help I can get. At this point, I’m just getting started, but with any luck the project will move quickly. Now if you’ll excuse me, I’ve got a fuselage to finish!

By |2024-09-18T14:10:08-04:00July 18, 2023|Aircraft, Articles|Comments Off on Building an RV-12 (Part 2)

Building an RV-12 (Part 1)

Like probably most of you, I read aviation magazines, including Sport Aviation, the EAA’s contribution to general aviation flying. In the 30 years since I first subscribed, I have read countless stories about building airplanes. After all those years the stories run together in a blurred line but a few oft-repeated ideas stand out. They don’t say much about what it is like to spend a couple or possibly a dozen years of your life trying to assemble something that may fly. You pick up instead the thought that if you want to finish the job you’d better do something on the airplane every day.

I’m retired. I have time on my hands. I’ve gotten much like the guys who write about building airplanes. I’m getting long in the tooth. We live on a farm property built more than 100 years ago and there is always work to do on the property. But after living here seven years, a lot of the essential stuff has been done. I talked with my wife Kathy about building the airplane, mentioning the time element —  maybe 700-900 hours, as suggested by the kit manufacturer.

Turns out those hours were for someone else. Me? I’m a slow guy. I can’t predict how long something is going to take until I do it. So neither Kathy nor I suspected that nearly two years from the time I picked up the first kit, I would still be lingering on the wings with the third kit waiting on me to open and inventory. I’m looking forward to that third kit. It is the part of the airplane with seats you can sit in and make airplane noises. It is also the part that the wings slide into and the rear fuselage rivets to, which will surely make the project look more like what I tell people it is.

The tools of the trade

I started out in the basement doing the most elemental work while remembering the tools of the trade I once worked with as an aspiring aviation mechanic. That was in school, not the real world. In the real world I didn’t remember as much as I thought. Thank goodness there is no welding or much fabrication with this kit. Van’s, the manufacturer, suggests they supply everything but the engine fluids and paint. I’ll take a minor exception to that. There is some fabrication.

There are a lot of tools required, few of them I already had. I bought tools piecemeal, suffering the waiting time for each to arrive, and then about halfway to where I am now, I read where Aviation Tool Company had a complete set of tools you will need at about half the cost I probably paid buying them one at a time. And yes, you really do need the exact tools Van’s recommends, not some dusty, rusty tool you have stored under your bench. I speak from experience: you can only fool yourself on this type of project.

Mistakes will be made

Van’s does an amazing job with their kits. They are exact. All the holes line up, even across the kits. The instructions are good, precise, and accurate. Written by engineers, you really need to pay attention to what is stated. Miss something and you will be rebuilding.

This attention to detail is not a natural thing. We tend to gloss over things, thinking we know what is being said and then moving on. But that won’t work for you on a Van’s kit. Read it. Read it. And read it again. Repeat as many times as necessary to fully understand what is being said. You will make mistakes¾everyone does. So I suppose there are no perfect airplanes. Maybe I should say there are no perfect homebuilt airplanes. It is up to the builder to decide if an error weakens the airframe. Being trained as an A&P mechanic, I think I have a fairly good feel for making that determination. Up to now any errors have been correctable and I’m confident when I test fly it there will be no problems.

I made a mistake on the vertical stabilizer, the first large piece I assembled. The last step to that part is bolting on the rudder hinges. The bolts suggested for the job would not go into the locking nut-plate holes I had riveted on the inside of the spar. I could not believe it. I called Van’s. The guy I talked with led me to understand the error, which was going to require drilling out a bunch of rivets to get down to the spar, drilling out the countersunk 3/32” rivets and riveting the right nutplates to the spar. No harm done, but it cost me a few days’ work.

So I’ve had to back up a few times but I’ve learned to read these plans better. I think harder on things before proceeding. A friend said he needed to build an airplane so he had a place to focus his thoughts. That’s a good description of what the building is like. It gets intense. Time flies.

You need space

When I started the wings I had to move out to the garage. They run about 15 feet, though nearly 4 feet of the inboard spars overlap in the cockpit behind the seats. There wasn’t enough room in my short-guys basement to get the wings built. It was fall when the wings arrived, so I was thinking about winter. I have a fine garage, but no one ever thought about heating it so far as I can determine.

I spent October insulating and installing heat in the garage. Even with that, the warmth is minimal. When it really gets cold, down around 10 degrees F, I have to find something else to do. I can’t tell you how many times my airplane building has been interrupted. I only thought I could build an airplane without a bunch of additional work to provide a good workspace (first the basement, then the garage).

All in all I’m happy with what I’ve put together so far. The RV-12 looks like a small Cherokee, though two seats instead of four. The wings are about the same, using the Hershey Bar design. This airplane is light, maybe 800 pounds including the engine, which may go more than 300 pounds. It’s stick-flown so I would expect it to be twitchy, especially in pitch. But Van’s says no. It is sensitive, maybe, but not twitchy. I’m looking forward to finding out. Maybe by next summer I will get this airplane built.

By |2024-09-18T14:13:13-04:00July 18, 2023|Aircraft, Articles|Comments Off on Building an RV-12 (Part 1)

Oil Filter Inspection

Routine oil filter inspections are a useful tool in the aircraft owner’s diagnostic toolbox. We use spectrometers to test for metals on a microscopic level, smaller than you can see and smaller than an engine’s oil filter will remove from the oil. Larger pieces of metal that might not show up in spectral testing will be trapped in the oil filter. By checking the filter at each oil change, you’ll get a good idea of what normal is for your engine and be able to quickly identify any changes that might be the early signs of a problem.

Cutting the housing

In order to inspect the filter pleats, they must first be removed from the housing. While a hacksaw or angle grinder might get you there, we strongly recommend using a filter cutter to remove the lid of the filter housing. A filter cutter cleanly cuts the robust steel housing without producing metal shavings that might find their way onto the filter pleats you are about to examine. Plus, who doesn’t like a good specialty tool?

The AFC-470 from Airwolf Filter Corp is our go-to cutter here at the lab: http://www.airwolf.com/aw/products/oil-filter-cutter. This tool fits the filter from any Lycoming or Continental engine we’ve come across. Airwolf also offers a smaller cutter for Rotax engine filters. For those who might also want to examine filters from other engines, like their car or truck, filter cutters that cover a wider range of filter sizes are available from speed shops such as Summit Racing. (https://www.summitracing.com/parts/sum-900511)

  1. Secure the filter lug in a bench vice. If the filter doesn’t have a lug, you can secure the lower section of the filter housing in the vice – just be careful to not crush the housing or it may trap the internal cartridge with the filter pleats. Poking a hole in the housing to allow oil to drain can also trap the internal cartridge, so we recommend avoiding that as well.
  2. Place the filter cutter on the filter and gently tighten the cutting wheel. We like to take a conservative approach in cutting the housing, progressively tightening the cutting wheel over a few rotations, rather than trying to cut through in one pass.
  3. Once the lid has been cut, the cartridge with pleats can be removed from the housing. It is also good to inspect the inside of the filter housing for metallic particles and other debris that may not be trapped in the filter pleats.

Removing pleats from the cartridge

You have two options at this point. You can use a solvent such as mineral spirits to wash debris from the pleats, leaving the cartridge assembly intact. The resulting solvent/debris slurry is then filtered for examination. In our experience, this flushing method may not always remove all of the debris from the filter pleats. We prefer to cut the filter pleats from the cartridge for examination by the following method.

Disclaimer: There is the potential to guillotine a finger or two during this process. Proper technique greatly reduces the chances of extensive cursing and an unplanned trip to the local emergency room.

  1. Place the filter cartridge horizontally on the bench and hold with your non-dominant hand. Locate the filter pleat seam that adjoins the two ends, usually with a metal band or glue.
  2. Hold the knife with your knuckles against the bench for stability. Starting at the seam and using only downward force, cut along the edge of the pleats opposite the side you are holding. We prefer to rotate the pleats into the knife blade, firmly holding the knife in a fixed position. This method, when done properly, protects your off-hand’s fingers from the knife blade, where the knife moves downward into the bench if it were to slip.
  3. Flip the cartridge around and repeat steps 1-3 on the other side. You may have to make a few passes on each side to fully cut the pleats. Using a new razor blade helps.
  4. Again locate the seam where the two ends of the filter pleats are joined together. Cut across the pleats on either side of the seam.
  5. The pleats can now be removed for examination. If properly cut, the pleats will come out in one long piece with a clean edge on both sides.
  6. The pleats will still contain a fair amount of oil at this point, making it difficult to see metallic debris. If time allows, you can place the pleats on paper towels to drain overnight. You can also squeeze the pleats like an accordion and mop up the oil that squeezes out with paper towels.

Inspecting the pleats and basic identification of common particles

Stretch the pleats out under a bright light or outside on a sunny day. Larger metal slivers will be obvious, but you may have to look quite closely to identify smaller particles. Here at the lab, we have a dedicated space with clamps that stretch the filter pleats out in one long section. You can improvise in the shop by placing something heavy on both ends of the pleats.

  • A strong magnet (covered with a plastic baggie or cling wrap) will remove ferrous particles from the pleats. We also suggest checking the pleats themselves with a magnet. Severe steel wear may generate enough small ferrous particles to make the pleats react to magnet.
  • Aluminum has a bright, silver appearance and will not react to a magnet.
  • Copper-containing alloys, such as brass or bronze, vary from a light straw to copper color and will not react to a magnet.
  • It is also common to find carbon, especially in the filters from turbocharged engines. Carbon is black, hard particles that can be broken apart between your fingers. A large amount of carbon might indicate excess blow-by, but what counts as excessive is unique to each engine. Regularly checking the oil filter will give you a good idea of how much carbon is normal for your engine. You might also find carbon with steel embedded in it, so it is good to check carbon particles with a magnet.
  • Small bits of sealer material may also be found, especially after repairs. We generally don’t worry about this sort of non-metallic debris.
  • You might also find lead deposits from fuel blow-by. These particles have a bright, foil-like appearance that can look very much like a metallic wear particle. These deposits can be distinguished from metallic wear by their soft and “smudgy” texture. It is worth mentioning that these deposits are not lead from the wearing surface of a crank or camshaft bearing.

Steel sliver

Aluminum flakes under magnification

Brass/bronze under magnification

Carbon deposit

Sealer material

Lead deposit

Evaluating Filter Debris/Conclusion

In some cases, a filter will contain so much metal that a looming problem is almost certain. But it is more often the case for the findings to land in an ambiguous gray area, where the severity of the metal is situationally dependent. You can expect to find some metal and other debris in the filter from a fresh overhaul, for example, where the same findings would be unusual in a routine filter inspection for that same engine at 500 hours since major.

Lycoming offers good guidance on the identification and evaluation of filter debris in Service Bulletin 480F. In our opinion, a lot of the information in that bulletin can also be applied to Continental engines. Blackstone also offers a filter and filter screen examination service as a compliment to oil analysis – but we recommend doing routine filter screenings yourself to get familiar with what’s normal for your particular engine. Save your money for flying — check your filter yourself!

Further Reading

https://www.lycoming.com/content/suggestions-if-metal-found-screens-or-filter

By |2024-09-18T14:16:01-04:00July 18, 2023|Aircraft, Articles, Gas/Diesel Engine, Lab Tests|Comments Off on Oil Filter Inspection

Emergency!

Unless you rent just one plane a lot, you never really know about a rental plane. You would like to think that it sees careful maintenance all the time, and I’m sure most of them do, but as long as some other person is flying it, it could have problems lurking that don’t show up every flight. Like most pilots, I would like to own a plane someday — something I could fly a lot and get familiar with. Unfortunately, a Republic SeaBee isn’t in the cards right now, so I’ll be renting for the time being. That leaves the possibility for unknown problems lurking that have to be dealt with on the fly (so to speak).

Half power

For me, my first experience with a problem in a rental was actually during flight training. I was flying a Cessna 152 out of Fort Wayne International. I was just going up solo for some touch and go’s and on my first climb-out the engine went to about half power. Thankfully it stayed at half power and I was able to fly the pattern and land without incident.

When I got back in to the flight training building and told my instructor what happened, I got a sense that she didn’t believe me. And sure enough, when we both took it up, everything was fine. She mentioned something like, “I’ll bet there was water in the tanks” (I thought, No, I sumped the tanks and they were clean — I do work in a lab, dammit!) and that’s the last I heard about it. Of course, I was renting the plane, so I don’t know if it had happened before or after my incident, or if something was fixed afterwards that may have been the cause.

In any case, I didn’t panic and made a nice landing (the plane was reusable) so really didn’t think much about it until several years later.

When suddenly…

I have had my private pilot’s license for a few years now, and I have been renting a 172N with the Continental O-300. I got checked out in it just fine and had taken a few flights previously by myself. On this particular day, I went up with my Dad (Jim Stark, Blackstone’s founder) and his wife on a sightseeing trip.

We flew north for about 30 minutes looking at the lakes of northeast Indiana, and we had just finished a turn south to head back when the engine started shaking. No little shudder either, but the kind of shaking a dog would make trying to pass razorblades — at least what I would imagine a dog would look like. My dog was never so dumb as to eat razorblades to start with.

Anyway, the engine started shaking really bad. My father (also a pilot) initially said “Get the carb heat on!” and I thought, of course! Carb heat! Continentals are prone to carb ice and I have had nightmares of having to force land an aircraft for just that reason. I’m not sure if I would have thought of that myself, so I was sure glad to have him sitting in the right seat.

I pulled on the carb heat so hard I thought the knob might come off. We sat expectantly for a minute, both waiting for the engine to smooth out. Unfortunately, that didn’t happen. We still had power, but the shaking was bad enough that the thought of a 30-minute flight back to Fort Wayne wasn’t appealing, so I looked at Dad and said, “We’re going back to Angola to land!”

Angola is a town about as close to the northeast corner of Indiana that you can get. It has a beautiful airport with a paved 5,000-foot east-west runway. We were only about five minutes away, but as you can imagine, it seemed to take about an hour to get there.

The carb heat was on the whole time yet the engine never smoothed out, so I figured the engine had some serious issues. The landing was uneventful and as we pulled up to the ramp the engine was still shaking, so we decided to do a mag check.

The right mag check produced no change, but the engine almost died on the left mag. We tested this several times to make sure it was correct and then shut the engine down. One of the best things about the Angola airport is they have an airport car that’s available for situations just like this. It was a late ’90s Ford Explorer that shook almost as bad as the airplane, but hey, beggars can’t be choosers.

I called the FBO where I rented the plane, told them the situation, and then drove home. After an hour’s drive, I pulled into the FBO, gave them the keys and paid my bill. Yes, full price for the time I had the airplane. No discounts for having to make an emergency landing and no allowance for my stepmother needing new underwear. It was okay though, I was just happy to be alive and back in Fort Wayne.

The bright side

Now, the good thing about renting an airplane is, when it breaks, all you have to do is say “Your plane is messed up” and leave. I don’t worry about having to schedule/pay the mechanic, call the people who were renting it afterwards and tell them to make other plans, no hangar fees, no insurance, no fixing knobs that got pulled off.

The bad part about it is that you really never get to know the aircraft and engine ¾ what’s normal operation and what’s not. After a few days, I get a call from the FBO manager who said the engine had a stuck valve. I was fairly amazed because I suspected the horrible mag check denoted something electrical as the problem.

We happened to be doing the oil analysis on this engine, so I checked that to see what it looked like. Aside from a little excess copper, it looked pretty good. However, the O-300 does have bronze exhaust valve guides, so this should have been a warning, at least to be on the lookout for valve problems.

Signs of the problem

Since this incident, I have learned that a really bad mag check is a common symptom of a stuck valve. Some other common symptoms are below.

  • Morning sickness — When an engine starts rough first time consistently, not just in the morning, without plug fouling
  • Temporary roughness on climb out or in cruise — this happens when a valve momentarily sticks, then shakes loose
  • Intermittent rough idle that’s not caused by carb ice (this needs to be ruled out)

If I had been the sole operator of this aircraft, I might have identified some of the other symptoms and put two and two together. Instead, I was not aware of any issues at all. In all fairness, maybe there weren’t any, I don’t know. But I know these symptoms now and I’ll be sure to look for them in the future.

By |2024-09-18T14:17:40-04:00July 18, 2023|Aircraft, Articles|Comments Off on Emergency!

Building an Engine Dehumidifier

Continental and Lycoming typically rate their engine life from 1,600 to 2,000 hours of operation between overhauls on most models. However, the only owners likely to achieve that kind of rated performance are those who use their aircraft on a nearly daily basis. Why? The reason is not the flying. It’s the parking!

A primary culprit for premature aircraft engine overhaul is corrosion caused by condensation that occurs after shutdown. Aircraft engines that are used daily frequently reach their rated TBO because liquid condensate is boiled off on a regular basis. Low use rate often results in reduced engine life.

Air Inlet Fitting In Oil Filler Cap

As the engine cools and the internal temperature drops below the dew point, liquid moisture condenses out of the vapor and clings to internal engine surfaces. This liquid water then resumes its ongoing process of eating up your engine from the inside out. However, if the dew point can be made sufficiently low, then liquid water will never form. This engine dehumidifier provides a continuous positive pressure injection of extremely dry air (dew point approximately -100oF) on a 24/7 continuous flow basis. It is recovered at the crankcase blow-by vent, returned to the pump, dried again and re-injected in the oil fill port of the engine.

How it works

The dehumidifier is connected the engine as soon after engine shutdown as possible, before the engine cools. It is then run on a 24/7 basis. A small aquarium-type air pump forces ambient humid air though plastic bottle containing silica gel (this is the stuff used in shipping and storing aircraft engines and electronics).

Air Fitting For Oil Cap

The silica gel has a great affinity for moisture and literally sucks it out of the air. The dried air is filtered and injected into the engine crankcase. Any moisture inside the engine vaporizes with the incoming dry air and is moved by the constant positive pressure from the air pump to the crankcase blow-by vent, then back to the pump and the silica gel dryer. At some point in time, the silica gel will absorb all the moisture it can hold. This is obvious because about 5% of silica gel crystals are dyed blue that changes to a pinkish color when saturated with moisture. At that point:

  • Remove the saturated silica gel from the bottle
  • Spread it out on a cookie sheet
  • Heat in oven at 275o F until the silica turns blue again
  • Cool and return to the bottle

Disassembled air pump. Remove the felt
filter in the bottom of the pump and plug
the hole with glue.

The frequency of this recycle rate will depend up the humidity of the environment. This may vary from months or more in dry regions down to just a week or so in the humid southeastern United States. Adding more silica gel to the bottle will extend the service interval.

Build your own

Connect the drier output via Tygon plastic tubing to the engine oil filler cap. A return line of Tygon tubing is fitted to the crankcase blow-by port. The preferred means of connection is to drill a ¼” hole in the oil filler cap and then install a short standpipe to the cap. I modified the oil filler cap by installing a hollow ¼”-20 carriage bolt. (I used a lathe to cut off the threads on the leading ½” of the bolt. This permits a slip fit of the Tygon dry air supply hose.)

The hollow bolt was then installed on the oil fill cap. Additionally, I made a ¼”-20 threaded Delrin plastic plug to cap this little standpipe during flight. Also, you will need to make an adapter to fit the crankcase blow-by tube. This can be a rubber stopper drilled to fit the Tygon return hose or a piece of rubber tubing with the return Tygon tube hot glued into it. drill two 3/16" holes in a 1 and 3/16" cap for the tubing

Please note that you will have to also devise a plug for the freeze-emergency blow-by vent located few inches up the blow-by vent pipe inside the aircraft engine nacelle. This can be a rubber flapper that normally closes the freeze vent. If the blow-by tube is frozen shut, crankcase pressure will push the rubber flap open.

The dehumidifier components consist of:

  • A vibrating reed “silent” type aquarium air pump
  • Two-liter plastic pop bottle with screw on cap
  • Airstone aquarium air bubbler
  • Ten feet of 1/8″ bore Tygon plastic aquarium tubing
  • Twelve inches of 3/16″ outside diameter (1/8″ inside diameter) rigid plastic tubing
  • One pound of 5% blue dyed silica gel
  • ¼-20 custom air fitting hollow bolt
  • Pump air intake tube

Note: Low-cost aquarium pumps do have an irritating 60 Hz buzz caused by their vibrating reed design. So-called “silent” pumps are the same design but are supported in a manner that will minimize noise. If you spend a lot of time in the hangar, I strongly recommend the “silent” type pump.

To construct the dehumidifier, you will need an X-acto knife, a drill and ¼” and 3/16” drill bits, a hot glue gun, and gel super glue.

Extending the dessicant recycle time

The following modification can extend the intervals between service times for the desiccant. It revamps the dryer cycle from an open- loop system into a closed-loop. Dry air is still injected as before into the oil filler neck, but in addition, a vacuum line is attached to the crankcase blow-by tube that returns dry air back through the engine. This eliminates the continuous drying of external incoming humid air into the system and provides for continuous circulation of ever-drier air in the crankcase.

Implementation

The air pump must be converted to a blow-and-suck configuration. To do this you will need to make an additional fitting for the air intake port next to the air output port on the pump. Drill a 3/16” hole about ½” to the right of the exhaust port. Remove the felt filter in the belly of the pump case and plug the hole with glue.

Pump Return Line Installed In Blow By Port

Pump Return Line Installed In Blow By Port

To work as a vacuum pump, the pump case must be made airtight. This is done by disassembling the air pump case (two screws) and applying RTV silicon aquarium cement around the entire case seam and around all four sides of the power cord strain relief. Then reassemble the case and allow it to dry. Also, add RTV glue to any screw heads or tape over recess holes in the case bottom for an airtight seal.

You will also need to make an adapter fitting such as a rubber hose or rubber stopper fitted with a length of the Tygon tubing to serve as an air return to the pump.

Fabrication

Drill two 3/16” holes about ¼”off the center in the top of the bottle cap, close enough to the center to allow easy tube clearance of the bottle neck interior wall. For the pump inlet input, insert a 2” length of the rigid tubing in one hole and hot glue it into place. Insert the remaining 10” rigid tube in the other hole and hot glue it so the bottom end of the tube is positioned about 2″ from the bottom of the bottle.

Use a 1″ length of the Tygon flex tube to connect the aquarium bubbler airstone to the end of the longer rigid tubing. The Airstone is used as a dust filter to keep silica gel particles out of the engine. The airstone should lie on the bottom of the bottle.

To prep the silica gel, it in your kitchen oven at 275oF until the dyed silica gel pellets turn blue (they are pinkish when saturated with moisture). Open the bag and pour the contents into a clean and dry two-liter pop bottle. Insert the airstone/tube assembly, work the airstone to the bottom of the silica gel, and tighten the cap. Do not delay, as it will absorb moisture from the air.

open-loop dryer assembly

Open-loop dryer assembly

Use about a foot of the Tygon tubing to plumb the air pump to the short air input stub. Connect 6 feet or more of Tygon tubing to the airstone-equipped exit port, then to the air fitting on the oil filler cap. Connect the pump return line to the crankcase breather port via an airtight rubber seal.

Note: All connections and seals must be a leak-tight fit. Mating via the crankcase blow-by vent tube (usually located near the firewall) may be done by inserting a piece of the rigid tubing through a 3/4” closed-cell-foam ball or a tightly fitting rubber stopper.

A secondary modification required is a plug for the freeze slot in the blow by tube. This can be a rubber flap around the blow-by pipe that is normally closed over the freeze slot, but is pushed open by crankcase pressure if the exit end of blow-by tube end should freeze shut. Finally, a foam plug fitted to your aircraft’s air intake with a “REMOVE BEFORE FLIGHT” flag attached will close up the system circulation (in the case of a crankshaft position that leaves an intake valve open).

By |2024-09-18T14:19:35-04:00July 18, 2023|Aircraft, Articles|Comments Off on Building an Engine Dehumidifier

Annual Inspection

Well, the building is over and my RV-12 is in the air. Now that I’ve got an airplane I can actually use to go places and have fun, life is a bit less hectic. Still, the fun has to stop sometime and for airplane owners, the opposite of fun is often the annual inspection. Since my aircraft is an experimental, I have to do what’s known as a condition inspection. There is maybe less paperwork involved than the annual inspection that certified aircraft have to go through, but the potential for pain is there. To be clear, this inspection is an extremely important thing to do and the pain will often be limited to just a lack of flying, though there is always the possibility that a major repair will be needed and then the pain can quickly spread to your wallet.

Inspection #2

I am actually on my second condition inspection. The first one was done in July of 2021 and it went really well. The airplane was new (only 26 hours on it), so there really weren’t any issues involving worn-out parts and other things that older aircraft have to deal with. Nope, just checking to make sure everything was working properly and all the fasteners were still holding fast.

This year has been different, but it’s not really the plane’s fault. My wife and I started the inspection in mid-July, when the weather was nice and there was still plenty of year left, but didn’t get it completely done until just last weekend (the end of January). Again, the plane is still fairly new (only at 46 hours now), so there really weren’t that many problems to address. No, this year the problem was with me. Life and work tend to have a way of keeping you busy and this year it’s been a struggle to string a few weeks together to do the inspection.

DIY maintenance

As many of you with experimental aircraft know, one of the perks of building an airplane is getting to do all of your own maintenance. No more having to find a mechanic and work around their schedule or pay their bills. The other side of the coin is, you have to do all your own maintenance. In fact, there isn’t a mechanic in this area that will touch an experimental aircraft, so I couldn’t hire this job out even if I wanted to. Thankfully, the work itself is pretty simple overall and the nice thing is there is a checklist to follow. These are printed in the maintenance manual and include a systematic checklist of everything that needs to be looked at.

I don’t think you have to be especially mechanically inclined or talented to do this job yourself, but a little mechanical knowledge probably helps. I took a 2-day class in Dallas to get a repairman certificate with an inspection rating. It was full of good information, but possibly the most important thing they did was show all the many ways people can die as a result of taking shortcuts and not following the checklist. By the time I was done with that class, I was fairly gripping the chair arms with white-knuckled fists, and ready to triple check to make sure I dotted all my i’s and crossed all my t’s.

Oil change at annual

The checklist has all kinds of things on it, and I can see how it might be tempting to skip something that seems unnecessary. One of the things on that checklist is normally an oil change. This is a standard part of most annuals and often times it’s done whether the oil actually needs changed or not. We see short-run samples like this all the time at Blackstone and often wonder if the owner is looking for a problem, or if the plane is just in for annual and this was on the list. A portion of the annual inspection checklist from Vans

In my mind, if there was any one item on the inspection checklist that could be skipped, it would be an oil change that’s not needed (Blackstone’s lawyers would like to remind you that this is one man’s opinion only; officially, Blackstone advises you to follow the checklist!). Still, with that being said, an oil change is really an excellent diagnostic tool. You can send in an oil sample to see if the engine is wearing poorly and cut open the oil filter to see if it has any visual metal present. The problem with a short-run sample is, we can rarely tell the customers a lot other than there wasn’t much metal in the oil, so it looks okay from what we can see.

Unless you suspect a problem, a short-run filter inspection would also be of minimal value, for the same reason—there really isn’t enough time for any significant metal to accumulate. So how about a situation where you are halfway through a typical oil change? Where you have enough time on the oil for an analysis to tell you something, but not enough time that the oil really needs to be changed? For situations like that, you might want to get an oil sample by pulling one up via the dipstick tube. We sell a pump for just that purpose. It’s reusable and the money you’d save on an unnecessary oil change would likely pay for the pump in pretty short order.

Sampling from the filter

Or, what might be an even better option is to just change the oil filter at that point. Then you can pour an oil sample right from the filter and still cut it open to look for metal. If you do follow this route, just let us know you got the oil sample from the filter. We might see a little more insoluble (solid) material in this situation, but the metals and all other results should be basically the same as if you got the oil as it was draining out of the sump.

We understand there might be some situations where it’s not possible to stray from the checklist and it’s just easier to dump the oil and start fresh, though if you have some leeway in that regard, skipping an oil change can save some time and money, making a potentially painful job a little less so.

By |2024-09-18T14:20:13-04:00July 18, 2023|Aircraft, Articles|Comments Off on Annual Inspection
Go to Top