


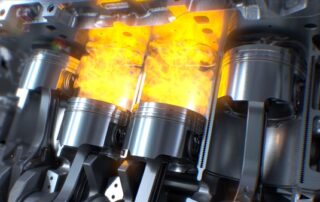
ZDDWhat?
Any search on the Internet today with regard to oil additives will eventually bring up the supposed problem that there is a lack of anti-wear additive called zinc dialkyl-dithiophosphate (shortened to ZDDP and showing up as the elements zinc and phosphorus ) in the new oils. People are worried the lack of ZDDP is causing the destruction of many older flat-tappet engines.
This first part of the problem seems to stem from an EPA mandate that all oil companies either reduce or eliminate ZDDP from their oils. While I’m sure the EPA mandates a lot of things, if they are telling the oil companies to get rid of this additive in their oils, the oil companies certainly aren’t listening.
Any automotive engine oil sample you send will have both zinc and phosphorus in it and at fairly high levels (anywhere from 500 to 1,000 ppm and often times a lot more). But is the Zn and P in the form of ZDDP? Are there other compounds that could leave Zn and P in the oil? So the first part of this issue isn’t really an issue at all, and that brings up the second part of the issue.
Is a lack of ZDDP really a problem for flat-tappet engines? My first inclination would be to say no, and that’s because 99% of all piston aircraft engines don’t use that additive in their oil.
Most aircraft engines are air-cooled, so they tend to run hot. Due to this, they require the use of an ashless oil. That simply means that when the oil burns, it must burn completely and not leave any ash behind. Aircraft engines are mostly flat-tappet engines and they seem to get along just fine without ZDDP. So is the second part of the problem really a problem?
I’m a mechanical engineer by training, and when I was in school, we learned the best way to answer that would be to follow the scientific method.
The Scientific Method
If you made it this far, then I guess you weren’t tired when you started reading this because the mere mention of the scientific method has been known to cause many a high school and collage kid to nod off almost immediately. For those who don’t remember what that method is, here’s quick refresher. But wait, before you continue reading, go get a cup of coffee because I don’t want to lose any of you.
- Define the question
- Gather information and resources (observe)
- Form hypothesis
- Perform experiment and collect data
- Analyze data
- Interpret data and draw conclusions that serve as a starting point for new hypothesis
- Publish results
- Retest (frequently done by other scientists)
1. Define the question: Is the lack of ZDDP a problem?
Apparently, the lack of ZDDP in the oil is causing the demise of older engines that still use flat tappets because without that anti-wear additive present, the camshaft lobes and tappets grind down to nothing, especially when the engine is brand new.
The thing is, this doesn’t necessarily happen to all of the camshaft lobes, just a select few. The magazine Popular Mechanics recently did an article on this and they showed a picture of a camshaft with one lobe worn down to nothing. I have my doubts about this because if there really was a problem with the oil, wouldn’t it affect all of the camshaft lobes and not just one? I don’t pretend to know all there is to know about camshaft design and surface hardness, but I know enough to reason that all of the lobes and tappets are lubricated by oil, and if the oil was indeed substandard, then wouldn’t it affect all of the lobes the same way?
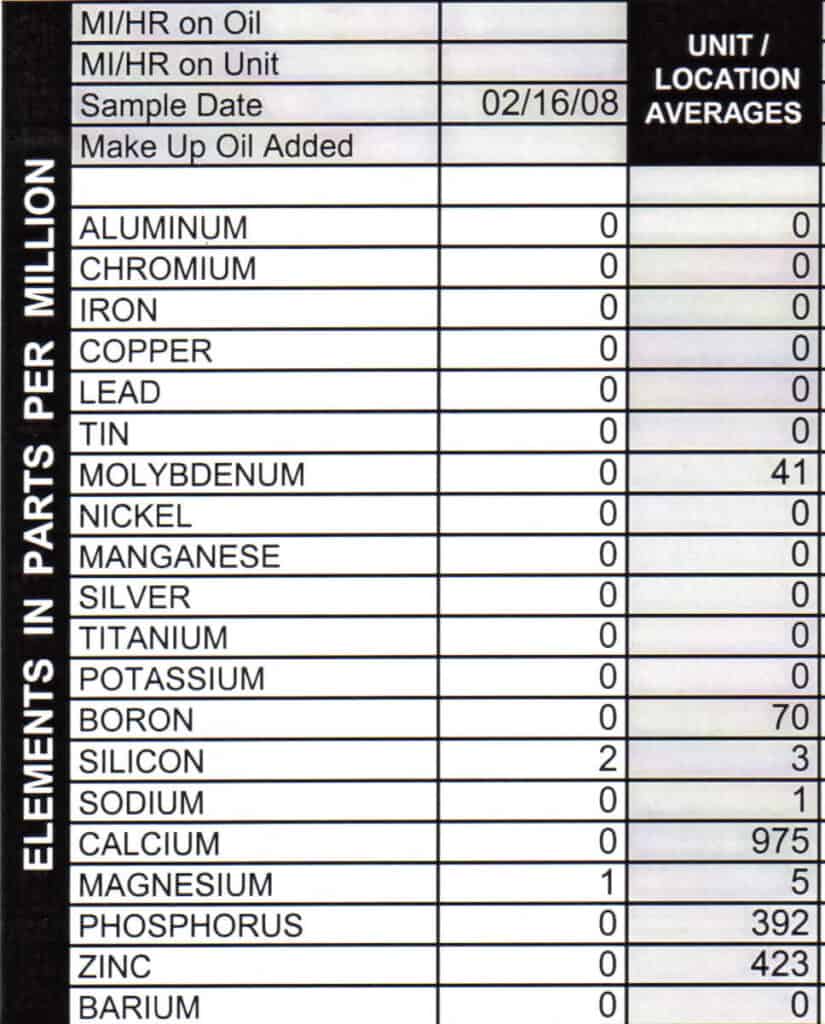
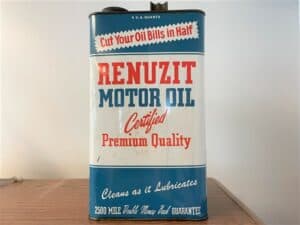
Figure 1: Aeroshell W65
This brings us to our next point: What would happen if you ran an oil that didn’t have any ZDDP in it at all? If that additive is so important, wouldn’t the complete lack of it cause camshafts to self destruct in a short period of time? I don’t think so, because aircraft engines do it all the time and the good majority of those last to 2,000 hours and well beyond.
2. Gather information and resources (observe)
Not much to do here. I did have to order some oil that didn’t contain ZDDP. That was Aeroshell W65 (see Figure 1). It’s a 30W oil commonly used by aircraft engines during colder months. That viscosity is close to the 10W/30 (at 210ºF) that I’ve run since the rebuild. It’s important to note that while this oil doesn’t contain any additives that we read, it is known as an ashless dispersant oil, so there are some additives in there.
3. Form hypothesis: The lack of ZDDP isn’t a problem at all
Never did understand this part. Isn’t it the same as define the question? Maybe I was asleep at the time. In any case, here is goes. I don’t think the lack of ZDDP is a problem at all, based on all of the normal looking aircraft engines we analyze that do not run that additive.
4. Perform experiment and collect data: My own engine
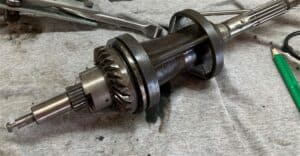
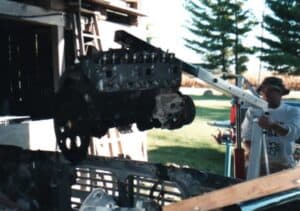
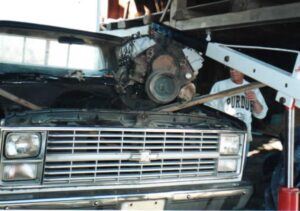
Since this is my experiment, I decided to use my own engine at a guinea pig. Back in 2004 I rebuilt the GM 350 engine in my 1984 Check ¾ ton pick-up truck. The rebuilding process didn’t quite go as planned but the engine has been running well since then and since it has flat tappets, I thought it would be a good engine to test. I control the operating conditions and another plus is that if the engine decides to explode, I’m the only one to blame and I won’t sue myself for damages, though there may be some lawyers who would take that case.
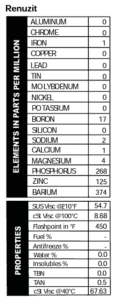
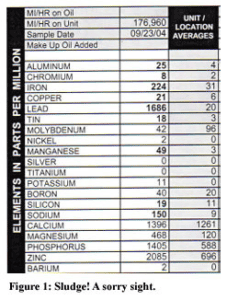
I changed oil originally back in February of 2008. Here is the report on the oil that I took out (see Figure 2). Not the best data, especially at lead, from bearings, but at least it’s consistent.
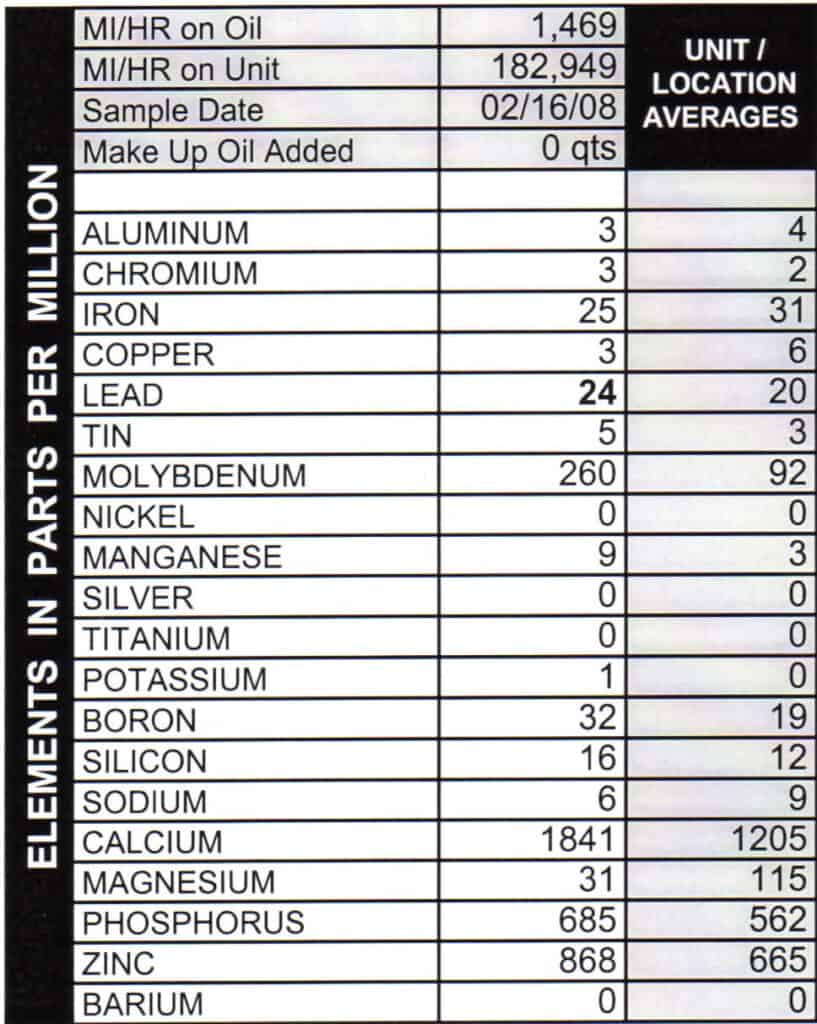
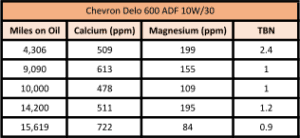
Figure 2: The original oil was Havoline 10W/30
5. Analyze data
That was the easy part. I’ve been looking at oil reports every afternoon since 1997, and I don’t have to pay for the samples.
6. Interpret data and draw conclusions that serve as a starting point for a new hypothesis
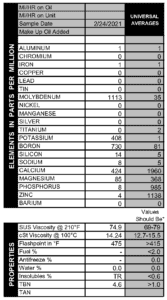
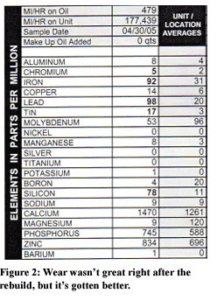
After 16 months and 1,943 miles I decided it was time to change the oil. You can see the results in Figure 3. At first glance it would seem that the engine’s steel parts didn’t really agree with the new oil. Iron went up to 37 ppm, which isn’t really a problem level, but more than I had been seeing.
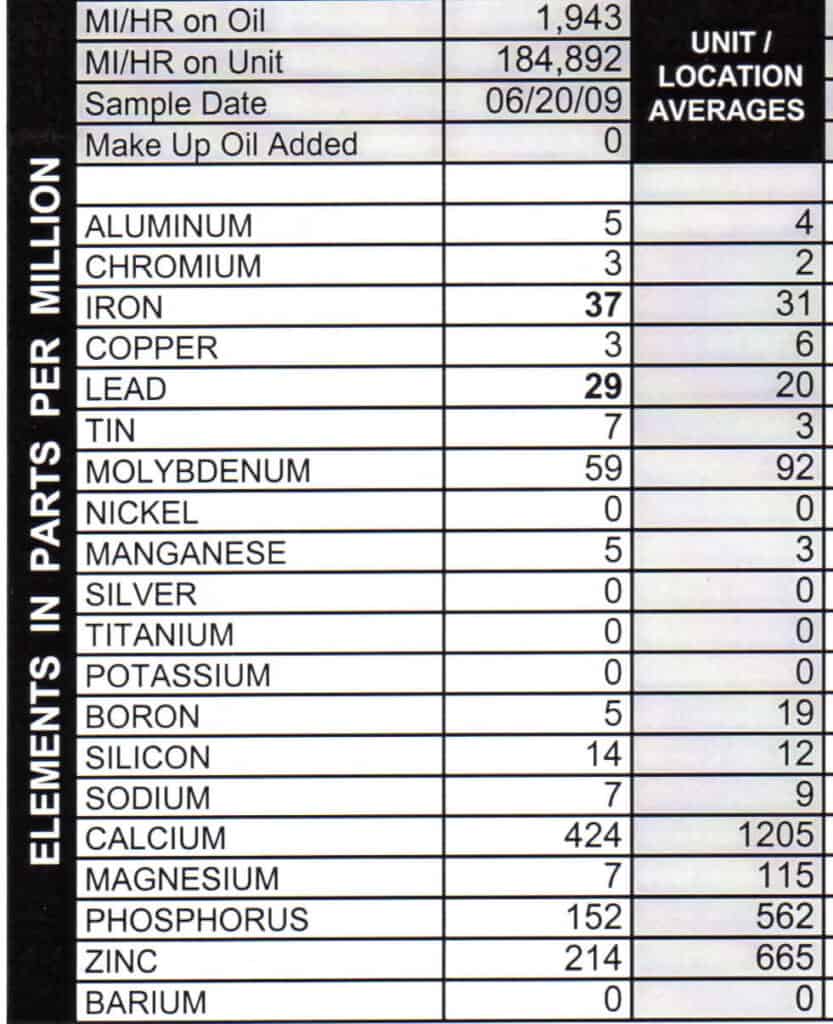
Figure 3: The first run on Aeroshell W65
However, it’s also important to note that this was the longest I had run the oil since the rebuild, both in time and mileage. Also, the engine doesn’t have any emission controls (don’t tell the EPA) and had an open breather coming off one of the valve covers.
So with it being exposed to the atmosphere, there is always a chance for rust to form on the parts, and that could account for the increase in iron. Lead was still excessive, but that didn’t really change, and nothing else unusual was present.
Note that this oil still had some additive in it (molybdenum, calcium, phosphorus, and zinc). These are leftover from the last fill and it turns out for this engine, about 20% of the old oil remains in the engine after an oil change. This is important to note because 20% of the metals are leftover from the last oil fill as well.
But the data from one sample doesn’t make for good science and I still had more Aeroshell to use, so I ran it again. This would help make sure the data was consistent and also make sure the lingering additives from the regular engine oil weren’t affecting my results.
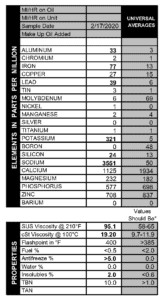
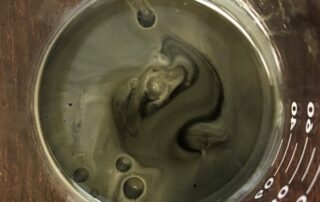
Figure 4: Wear improves!
The second oil was changed on October 30, 2010, after another 16 months and 1,921 miles this time (see Figure 4). At first glance you will notice a nice improvement in wear, especially lead. Does this mean the Aeroshell W65 is actually working better then other oils? Alas, no. When you don’t see in the data is that I took a 675-mile road trip during this oil run and I strongly suspect that highway trip is the reason for the improved wear, rather than any miraculous improvement due to Aeroshell.
This is an important fact to think about whenever you are looking at someone else’s oil report. Driving conditions can have a large effect on the data and unless you know what those conditions are, it is very easy to draw the wrong conclusions.
The conclusion I can draw is that no, my engine did not self-destruct running this oil. I didn’t actually visually inspect the camshaft, before or after this test, so I don’t know how much, if any, actual wear occurred in that area. So the test isn’t perfect in that regard, but I can say the engine is still running just fine.
So do we have a starting point for a new hypothesis now? Yes. Would my engine be okay if I had used this oil during break-in? Maybe, but we’ll won’t know until I rebuild another engine. When I do, I plan on use another oil that’s popular in the aircraft community: straight mineral oil with no additive whatsoever. Probably about 80% to 90% of the aircraft engines are broken in on this type of oil and they seem to do fine.
Are there any other new hypotheses? I’m sure there will be many that come by and most of them will center on how this test is invalid for some reason or another. And in response to that I would refer to section 8 of the scientific method and see what happens if you have the balls!
7. Publish results: That’s what you are reading
Not much to talk about here, and that brings us to our last point on the scientific method
8. Retest (frequently done by other scientists)
In this case, the other scientists are you and while I’m not suggesting any of you run Aeroshell in your automotive engines, you can use oil analysis to help solve questions you may have. Is synthetic oil really better than petroleum oil? Is that additive you’re using really helping? Feel free to draw up your own hypothesis and run your own tests. Don’t just buy an oil or additive, start using it, and then never stop just because the engine is running just fine. And by all means, don’t just take the word of the people who make oil and additives. Be objective and run some testing. I think you’ll be surprised by the results.


 The boat is a 1994 Starcraft 1700 with a 90 HP Mercury 2-stroke engine. It’s large enough to carry six people comfortably and pull a tube around the lake. She bought the boat used in 2016 and it had obviously not seen a whole lot use or maintenance in the preceding years, so I decided to help out with what little maintenance I could, which basically involved changing the oil in the lower unit.
 If wear is above average, we always look for reasons that might explain why. For example, say your metals are generally higher than average but you’re also running your oil longer than average. We take that into account and give you an estimate on how much longer we think you can go for the next oil change.


 We saw it with our own eyes several years ago, when an intern did a similar experiment out in the parking lot. He took a sample from his 1978 Ford pickup truck when it was cold, and that oil had no fuel in it. Then he started the engine and took another sample right away, and presto! Fuel contamination at 1.3%. So start-up can indeed cause fuel to enter into the oil, but newer engines may be better at avoiding excessive contamination.