Sudden Landing? Remember TWIT

Aviation is fraught with acronyms. There are so many acronyms that it is humorous to think the government still thinks they are a memory solution instead of the problem. I hate to add one more, but TWIT is one that may cause an unfortunate event in your life to turn out to be a good story instead of a tragedy. It is the word to remember should your (single) aircraft engine quit. You know, when the heat pump stops heating, when the cooling fan stops cooling, and/or when the roar of the engine that has always been your security blanket leaves nothing but silence ringing in your ears, uncovering your naked fear.

More than twenty years ago I was viewing the remains of an upside-down C-150 in a bean field with a couple guys from the Sheriff’s Department, when a civilian turned up. He was a lanky guy in a black suit with a camera slung across his shoulder. He asked me if I was the party that had left the airplane in this condition, and I admitted that I was the culprit. He said he was not only the undertaker in Paris, Illinois, but the newspaper photographer too, and when he gets a call like the one he got this morning, he didn’t know if he’d be taking pictures or measuring the body. With a grin, he pulled out a tape measure. “Looks like its only pictures this morning,” he said.

The saving grace of TWIT

I’ve had a long time to think about that and decided your early “engine out” training, as good and thorough as it may have been, could be improved upon with TWIT. Any engine out practice is good because if and when it really happens, you don’t need the tension of suffering the sensation for the first time. Few of us do first-time experiences well. So it is nice when you find yourself gliding around up there, sans engine, to have done it a few times before.

Everyone knows the first thing to do, which is to trim best glide speed. Don’t know it? Well, anything in the vicinity is okay. The idea, of course, is to give you the most time aloft for the altitude you are carrying. The reason that is important is that some prayers take far longer than others to complete. And if you happen to be one of those people who feels the need to pray with your eyes closed, well, you don’t want to waste all the glide time left with your eyes closed. It is a good idea to take a look at the terrain.

Trim

So the first letter to TWIT is for Trim, which hopefully gets you somewhere in the neighborhood of best glide. Your airspeed will be about 65–75, depending on the airplane. Our father…

Your flight instructor thought the next important thing to do was find a field to land in. With all due respect, that may not be the best idea. If you can hit a particular field from 5,000’ you are a better pilot than I am. You may pick the best field in your range of vision, but actually being able to hit it from altitude takes a lot of practice that we don’t generally work on. (Well…maybe the astronauts.)

My experience is, you will pick a field, and then see a better one as you get lower, and then a better one when you get lower than that. What makes it good is your ability to land on it, not its humongous size. It only takes a few hundred feet to land an airplane and you will find most fields at least that long. It is far more important to be landing into the wind so that length of field works. It is also nice to land without hitting anything. It is cheaper to buy a quarter acre of corn from a farmer than have to pay for his custom and recently rebuilt outhouse, which his insurance company will value in the tens of thousands of dollars.

Wind

So the second letter of TWIT is Wind. The first of the two turns you are going to make is the turn to base. You need to be adjacent to the wind. You probably know the wind direction, at least generally. If it is, for example, south, then turn east or west. If it is west, turn north or south. Which direction you turn will be decided on which direction has the best fields and the least structures. You don’t need much of a field, but when it comes to choosing one, the more options you have, the merrier.

If you are headed for a town or city, use some of that glide time to make a 180. A long walk out is better than hitting an unmovable object. Hopefully this is going to be the longest base leg you have ever flown. It will give you time to check your drift and verify the wind direction and speed. You might even stumble across a landing strip, if your GPS hasn’t already found one for you. If the wind is left, you are on a left base. If the wind is right, you are on a right base.

Initiate

You don’t pick your field until you see one that fits your sight picture for turning final. Few of us could hit a field from 5,000 feet, but all of us can hit the runway when turning final (well, almost all of us). If you are on left base, you are looking for the field on your left. If you are on right base, you are looking right. When the sight picture is what you are used to seeing, make your turn to Initiate the landing, which is the third letter to TWIT. It is time to get your flaps and wheels down if the wheels are retracted. (Shame on you if you did either of these things on that long base leg glide you were on.)

Talk 

No second guessing at this point. It is time to congratulate yourself on getting from way up there to way down here without having done anything foolish, and you can already hear yourself telling a story about your successful off-field landing. Now that you are kicked back and gliding to final, it is a good time to call ATC, FSS, or perhaps your Maker, and let them know where they may find you, while you still have a little altitude left. You may have already done this earlier when you tuned your transponder to the emergency code, but it wouldn’t hurt to call in again, just to prove you can still talk without stuttering. I can speak here from experience — the last thing on your mind when your engine quits will be the radio. That’s why TWIT ends in Talk. You may be comfortable enough, or have enough presence of mind, to actually talk with someone other than yourself, once you have the field made.

Next time your engine gives up the ghost and you have already run through all the nasty words you can think of, try yelling TWIT to yourself. It may help you get down to terra firma safely.

By |2024-09-18T13:59:14-04:00July 18, 2023|Aircraft, Articles|Comments Off on Sudden Landing? Remember TWIT

EGT Myths Debunked

Reprinted with permission from the author, Mike Busch

Pilots still seem to have a lot of misconceptions about exhaust gas temperature (EGT). Let’s see if we can clear some of them up.

These days, pilots of piston-powered aircraft seem to have fixated upon EGT. Scarcely a day goes by that I don’t receive a phone call, email, or support ticket asking some EGT-related question.

Pilots will send me a list of EGT readings for each of their cylinders and ask me if think they look okay, whether I think their EGTs are too high, what maximum EGT limit I recommend, why their EGTs seem to be higher in the winter than in the summer, or why the EGTs on their 1972 Cessna 182 are so much higher than the ones on their friend’s 1977 model. They’ll voice concern that the individual cylinders on their engine have such diverse EGT readings, worry that the spread between the highest and lowest EGT is excessive, and ask for advice on how to bring them closer together. They’ll complain that they are unable to transition from rich-of-peak (ROP) to lean-of-peak (LOP) operation without producing EGTs that are unacceptably high.

Each of these questions reveals a fundamental misunderstanding of what EGT measures, what it means, and how it is interpreted. Let me attempt to clear up some of this confusion by asking you to forget everything you thought you knew about EGT and start at the beginning.

What EGT is not

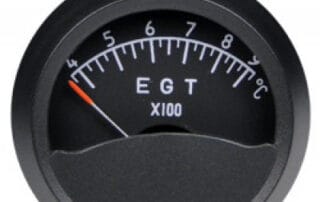
The absolute values of EGT are not particularly interesting for a number of reasons. The most important is that indicated EGT is not a “real” temperature. To understand what I mean by this, I’d like you to conduct a thought experiment: Imagine that you’re an EGT probe, located in an exhaust riser between two and four inches from the exhaust port of a cylinders, and think about what you would see.

You’d see nothing much for two-thirds of the time¾during most of the intake, compression, and power strokes, because the exhaust valve is closed and so no exhaust gas is flowing out of the exhaust port and past the probe. During the one-third of the time that the exhaust valve is open, you’d see a constantly changing gas temperature that starts out very hot when the valve first opens but cools very rapidly as the hot compressed gas escapes and expands, and then ultimately is scavenged by cold induction air during the valve overlap period (at the end of the exhaust stroke and the beginning of the intake stroke) when both intake and exhaust valves are open simultaneously.

Now, all these gyrations are happening about 20 times per second, and you (the EGT probe) cannot possibly keep up with them. You wind up stabilizing at some temperature between the hottest and coolest gas temperature you see, and you dutifully report this rather arbitrary temperature to the panel-mounted instrument, where it is displayed to the pilot as a digital value accurate to one degree. The temperature you report to the pilot is not exhaust gas temperature (which is gyrating crazily 20 times a second) but rather exhaust probe temperature (which is stable but related to actual exhaust gas temperature in roughly the same fashion as mean sea level is to high tide).

To make matters worse, numerous factors can affect indicated EGT besides actual exhaust gas temperature. These include probe mass and construction (grounded or ungrounded), cam lobe profile, lifter leak-down rate, valve spring condition, and exhaust manifold topology, among others.

For example, the two front cylinders (numbers 5 and 6) on the left engine of my Cessna T310R always indicate lower EGTs than the other four cylinders. The exact same phenomenon also occurs on the right engine. This is not because those front cylinders produce cooler exhaust gas than their neighbors (they don’t), but because the exhaust risers for those cylinders curve aft while the other four risers go straight down. Thus, the gas flow past the EGT probe is different for the front cylinders than for the others, and their indicated EGT is lower. This temperature anomaly is quite obvious on my digital engine monitor¾and also quite meaningless.

What EGT means

Even if indicated EGT accurately reported actual exhaust gas temperature (which it doesn’t), it’s important to understand that exhaust gas temperature does not correlate with stress on the engine the way cylinder head temperature does. In fact, many things that increase engine stress (such as advanced ignition timing and high compression ratio) cause EGT to go down, while things that reduce engine stress (like retarded ignition timing and low compression ratio) cause EGT to go up.

Remember that CHT mainly reflects what’s going on in the cylinders during the power stroke when the cylinder is under maximum stress from high internal temperatures and pressures, while EGT mainly reflects what’s going on during the exhaust stroke after the exhaust valve opens and the cylinder is under relatively low stress.

High CHTs often indicate that the engine is under excessive stress, which is why it’s so important to limit CHTs to a tolerable value (no more than 400°, preferably 380° or less). By contrast, high EGTs do not indicate that the engine is under excessive stress, but simply that a lot of energy from the fuel is being wasted out the exhaust pipe rather than being extracted in the form of mechanical energy.

For instance, a 1972 Cessna 182 with an O-470-R engine will typically have indicated EGTs that are 100 degrees hotter than those seen in a 1977 Cessna 812 with an O-470-U engine. The -R has a relatively low 7.0–1 compression ratio because it was certificated for 80-octane avgas, while the -U engine has a much higher 8.6–1 compression ratio because it was certificated for 100-octane. Because the high-compression -U engine is significantly more efficient at extracting heat energy from the fuel, it wastes less energy out the exhaust and this its EGTs are cooler (despite the fact that the -U engine is much more highly stressed than the -R).

High EGTs do not represent a threat to cylinder longevity the way high CHTs do. Therefore, limiting EGTs in an attempt to be “kind to the engine” is simply misguided.

Diff versus Gami spread

Right behind the “high EGTs are bad” myth is the “identical EGTs are good” myth. Many pilots believe incorrectly that a flat-topped graphic engine monitor display (with all EGTs equal) is the mark of a well-balanced engine, and that unequal EGTs are a sign that something is wrong. This common misconception tends to be reinforced by digital engine monitors that display a digital “DIFF” showing the difference between the highest and lowest EGT indication.

As illustrated by the earlier anecdote about the front cylinders on my Cessna 310R, difference between absolute EGT values are both normal and benign. It is not uncommon for well-balanced fuel-injected engines to exhibit EGT spreads of 100 degrees, and carbureted engines often have spreads of 150 degrees or more. In fact, as shown in Figure 4, EGT spreads are usually smallest near or just rich of peak EGT (the worst place to operate the engine), and often significantly greater at leaner or richer mixture (that are much kinder to the engine.

The mark of a well-balanced engine is not a small EGT spread (“DIFF”), but rather a small “GAMI spread”– defined as the difference in fuel flows at which the various cylinders reach peak EGT. Ideally, we would like to see this peak be no more than about 0.5 gph (or 3 pph). Experience shows that if the GAMI spread is much more than that, the engine is unlikely to run smoothly with LOP mixtures.

It’s all relative

The only important thing about EGT is its relative value: how far below peak EGT and in which direction (e.g., 100 degrees ROP or 50 degrees LOP). Absolute values of EGT (e.g., 1,475 degrees) are simply not meaningful and are best ignored. There is no such thing as a maximum EGT limit or redline, and trying to keep absolute EGTs below some particular value¾or even worse, leaning to a particular absolute EGT value¾is simply wrongheaded. Don’t do it. If you must fixate on those digital engine monitor readouts, fixate on something important, like CHT.

By |2024-09-18T14:00:14-04:00July 18, 2023|Aircraft, Articles|Comments Off on EGT Myths Debunked

Critical Component Failures

This article, by Mike Busch, originally appeared in the March 2010 issue of Sport Aviation as part three in the series “Reliability-Centered Maintenance.” We are reprinting it with the permission of the author.

To properly apply reliability-centered maintenance (RCM) principles to the maintenance of our piston aircraft engines, we need to analyze the failure modes and failure consequences of each major component part of those engines.

In this article we’ll examine the critical components of these engines, how they fail, what the consequences are of those failures on engine operation and safety of flight, and what sort of maintenance actions we can take to deal with those failures effectively and cost-efficiently.

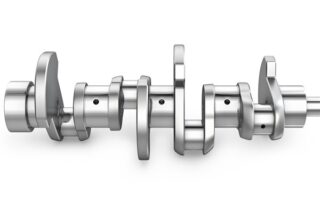
Crankshaft

It’s hard to think of a more serious piston engine failure mode than a crankshaft failure. If it fails, the engine quits. Yet crankshafts are rarely replaced at overhaul. Lycoming says their crankshafts often remain in service for more than 14,000 hours and 50 years! TCM hasn’t published this sort of data, but TCM crankshafts probably have similar longevity.

Crankshafts fail in three ways: 1) infant-mortality failures due to improper material or manufacture, 2) failures following unreported prop strikes, and 3) failures secondary to oil starvation and/or bearing failure.

We’ve seen a rash of infant mortality crankshaft failures in recent years. Both TCM and Lycoming have had major recalls of crankshafts that were either forged from bad steel or were physically damaged during manufacture. Those failures invariably occurred within the first 200 hours after a newly manufactured crankshaft entered service. If a crankshaft survives the first 200 hours, we can be pretty confident that it was manufactured correctly and should perform reliably for many engine TBOs.

Unreported prop strikes seem to be getting rare because owners and mechanics are becoming smarter about the high risk of operating an engine after a prop strike. Both TCM and Lycoming state that any incident that damages the propeller enough that it has to be removed for repair warrants an engine teardown inspection. This applies even to prop damage that occurs when the engine isn’t running. Insurance will pay for the teardown and any necessary repairs, no questions asked, so it’s a no-brainer.

That leaves us with failures due to oil starvation and/or bearing failure. We’ll talk about these when we look at oil pumps and bearings.

Crankcase

Crankcases are also rarely replaced at major overhaul, and they often provide reliable service for many TBOs. If the case stays in service long enough, it will eventually crack. The good news is that case cracks propagate slowly, so a detailed annual visual inspection is sufficient to detect such cracks before they pose a threat to safety. Engine failures caused by case cracks are extremely rare.

Camshaft and lifters

The cam/lifter interface endures more pressure and friction than any other moving parts in the engine. The cam lobes and lifter faces must be hard and smooth in order to function and survive. Even tiny corrosion pits (caused by disuse or acid build-up in the oil) can lead to rapid destruction (spalling) of the cam and lifters and the need for a premature teardown. This is the number one reason that engines fail to make TBO. This problem mainly affects owner-flown airplanes because they tend to fly irregularly and sit unflown for weeks at a time.

Camshaft and lifter problems seldom cause catastrophic engine failures. The engine will continue to make power even with severely spalled cam lobes that have lost a lot of metal, although there is some small loss of power. Typically, the problem is discovered when the oil filter is cut open and found to be full of metal.

If the oil filter isn’t cut open and inspected on a regular basis, the cam and lifter failure may progress undetected to the point that ferrous metal circulates through the oil system and contaminates the engine’s bearings. In rare cases, this can cause catastrophic engine failure. A program of regular oil filter inspection and oil analysis will prevent such failures.

If the engine is flown regularly, the cam and lifters can remain in pristine condition for thousands of hours. Some overhaul shops routinely replace the cam and lifters with new ones at major overhaul, but other shops use reground cams and lifters and most knowledgeable engine experts agree that properly reground cams and lifters are just as reliable as new ones.

Gears

The engine has lots of gears: crankshaft and camshaft gears, oil pump and fuel pump drive gears, magneto and accessory drive gears, prop governor drive gears, and sometimes alternator drive gears. These gears typically have a very long useful life and are not usually replaced at major overhaul unless obvious damage is found. Gears rarely cause catastrophic engine failures.

Oil pump

Failure of the oil pump is occasionally responsible for catastrophic engine failures. If oil pressure is lost, the engine will seize quite quickly. The oil pump is very simple, consisting of two gears in a close-tolerance housing, and is usually trouble-free. When trouble does occur it usually starts making metal long before complete failure occurs. Regular oil filter inspection and oil analysis will normally detect oil pump problems long before they reach the failure point.

Bearings

Bearing failure is responsible for a significant number of catastrophic engine failures. Under normal circumstances, bearings have a very long useful life. They are always replaced at major overhaul, but it’s quite typical for bearings that are removed at overhaul to be in excellent (sometimes even pristine) condition with very little measurable wear. Bearings fail prematurely for three reasons: (1) they become contaminated with metal from some other failure; (2) they become oil-starved when oil pressure is lost; or (3) they become oil-starved because the bearing shells shift position in the crankcase saddles to the point where the bearing’s oil supply holes become misaligned (“spun bearing”).

Contamination failures can be prevented by using a full-flow oil filter and inspecting the filter for metal on a regular basis. So long as the filter is changed before its filtering capacity is exceeded, particles of wear metals will be caught by the filter and won’t contaminate the bearings. If significant metal is found in the filter, the aircraft should be grounded until the source of the metal is found and corrected.

Oil starvation failures are fairly rare. Pilots tend to be well-trained to respond to loss of oil pressure by reducing power and landing at the first opportunity. Bearings will continue to function properly even with fairly low oil pressure (e.g., 10 psi).

Spun bearings are usually infant mortality failures that occur either shortly after an engine is overhauled (assembly error), or shortly after cylinder replacement. Failures can also occur after a long period of crankcase fretting (which is detectable through oil filter inspection and oil analysis), or after extreme cold-starts without proper pre-heating. These are usually random failures, unrelated to hours or years since overhaul.

Connecting rods

Connecting rod failure is responsible for a significant number of catastrophic engine failures. When rod fails in flight, it often punches a hole in the crankcase and causes loss of engine oil and subsequent oil starvation. Rod failures have also been known to result in camshaft breakage. The result is invariably a rapid loss of engine power.

Connecting rods usually have a very long useful life and are not normally replaced at major overhaul. (The rod bearings, like all bearings, are always replaced at overhaul.)  Some rod failures are infant mortality failures caused by improper torque of the rod cap bolts. Rod failures can also be caused by failure of the rod bearings, and these are usually random failures unrelated to time since overhaul.

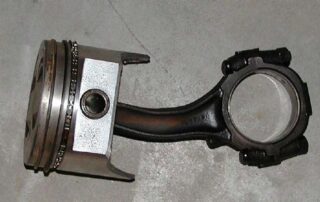
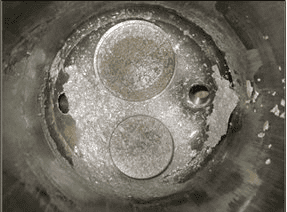
Pistons and rings

Piston and ring failures can cause catastrophic engine failures, usually involving only partial power loss but occasionally total power loss. Piston and ring failures are of two types: (1) infant mortality failures due to improper manufacture or installation; and (2) heat-distress failures caused by pre-ignition or destructive detonation events. Heat-distress failures can be caused by contaminated fuel or improper engine operation, but they are generally unrelated to hours or years since overhaul. Use of a digital engine monitor can usually detect pre-ignition or destructive detonation episodes and allow the pilot to take corrective action before heat-distress damage occurs.

Cylinders

Cylinder failures can cause catastrophic engine failures, usually involving only partial power loss but occasionally total power loss. A cylinder has a forged steel barrel mated to an aluminum alloy head. Cylinder barrels normally wear slowly, and excessive wear is detected at annual inspection by means of compression tests and borescope inspections. However, cylinder heads can suffer fatigue failures, and occasionally the head can separate from the barrel, causing a catastrophic engine failure. Cylinder head failures can be infant mortality problems (due to improper manufacture) or can be age-related. Age-related failures seldom occur unless the cylinder is operated for more than two or three TBOs. Nowadays, most major overhauls include new cylinders, so age-related cylinder failures have become quite rare.

Valves and valve guides

It is quite common for valves and guides (particularly exhaust) to develop problems well short of TBO. Valve problems can usually be detected prior to failure by means of compression tests, borescope inspections, and surveillance with a digital engine monitor (provided the pilot knows how to interpret the engine monitor data). If a valve fails completely, a significant power loss can occur.

Rocker arms and pushrods

Rocker arms and pushrods (which operate the valves) typically have a very long useful life and are not routinely replaced at major overhaul. (Rocker arm bushings are always replaced at overhaul). Rocker arm failure is quite rare. Pushrod failures are caused by stuck valves and can almost always be avoided through repetitive valve inspections and digital engine monitor usage, as discussed earlier.

Magnetos

Magneto failure is uncomfortably commonplace. Fortunately, aircraft engines are equipped with dual magnetos for redundancy, and the probability of both magnetos failing simultaneously is extremely remote. Mag checks during pre-flight run-up can detect gross magneto failures, but in-flight mag checks are far better at detecting subtle or incipient failures. Digital engine monitors can reliably detect magneto failures in real time if the pilot knows how to interpret the data. Magnetos should be disassembled, inspected, and serviced every 500 hours—doing so drastically reduces the likelihood of an in-flight magneto failure.

The bottom line

The “bottom-end” components of these engines—crankcase, crankshaft, camshaft, bearings, gears, oil pump, etc.—are very robust. They normally exhibit very long useful lives that are many times as long as recommended TBOs. Most of these bottom-end components (with the notable exception of bearings) are reused at major overhaul and not replaced on a routine basis.

When these items do fail prematurely, the failures mostly occur shortly after engine manufacture, rebuild, or overhaul, or they are random failures that are unrelated to hours or years since overhaul. The vast majority of random failures can be detected long before they get bad enough to cause catastrophic engine failure simply by means of routine oil filter inspection and laboratory oil analysis. There seems to be no evidence that these bottom-end components exhibit any sort of well-defined steep-slope wear-out zone that would justify fixed-interval overhaul or replacement at TBO.

The “top-end” components—pistons, cylinders, valves, etc.—are considerably less robust. (The “top end” of a piston engine is analogous to the “hot section” of a turbine engine.) It is not unusual for top-end components to fail prior to TBO. However, most of these failures can be prevented by regular inspections (compression tests, borescope, etc.) and by use of digital engine monitors (by pilots who have been taught how to interpret the data). Furthermore, when potential failures are detected, the top-end components can be repaired or replaced quite easily without the need for engine teardown. Once again, the failures are mostly infant-mortality failures or random failures that do not correlate with time since overhaul.

The bottom line is that a detailed failure analysis of piston aircraft engines using RCM principles strongly suggests that what the airlines and military found to be true about turbine aircraft engines is also true of piston aircraft engines: The traditional practice of fixed-interval overhaul or replacement is counterproductive. A conscientiously applied program of on-condition maintenance that includes regular oil filter inspections, oil analysis, compression tests, borescope inspections, and in-flight digital engine monitor usage can be expected to yield improved reliability and much reduced maintenance expense and downtime.

Magnetos are an exception. They really need to go through a fixed-interval major maintenance cycle every 500 hours, because we have no effective means of detecting potential magneto failures without disassembly inspection.

By |2024-09-18T14:03:20-04:00July 18, 2023|Aircraft, Articles|Comments Off on Critical Component Failures

Aircraft Oil: Go Ashless or Go to the Repair Shop

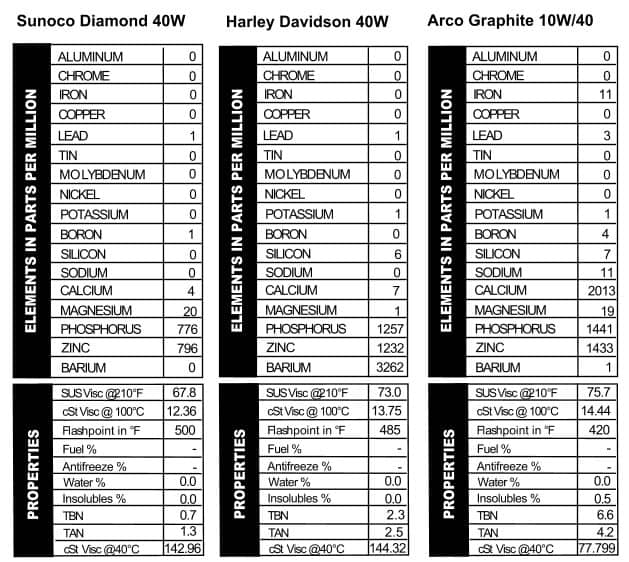
Any of you flying air-cooled aviation engines should be familiar with the phrase AD oil or Ashless Dispersant oil. These are special oils designed for aircraft engines and their use will help protect again pre-ignition and detonation. But what exactly does ashless mean?

Basically when you burn the oil, it will completely disappear and leave no significant ash behind. For non-ashless oils, most of the ash left behind when you burn the oil is from additives in the oil itself. Automotive and diesel engine oil designs for liquid cooled engines will contain a lot of additive that are is ashless and it’s not a problem in those types of engines because they don’t typically run hot enough to burn the oil.

Air-cooled aircraft engines are another story. In those engines, it is common for certain engine parts to reach temperatures at which the oil can burn. If a non-ashless oil was used, then deposits from the left-over ash could end up sticking to valves and ring lands. Those deposits could lead to hot-spots in the combustion chamber and those commonly cause pre-ignition.

The dispersant part of AD means there is additive present that is meant to hold solids in suspension so then can either be filtered out, or drain when the oil is being changes. If this additive is not present, it would be a lot easier for sludge to build-up in your engine during normal operation.

While the use of ashless oils won’t necessarily prevent all of the problems associated with pre-ignition and detonation, it is one easy way to help protect your engine from these dangers.

By |2024-09-18T14:04:07-04:00July 18, 2023|Aircraft, Articles|Comments Off on Aircraft Oil: Go Ashless or Go to the Repair Shop

Fuel Contamination in Aircraft

Here in the northern latitudes autumn brings uncertainty about what to expect from the sky and wind each morning. Rain and overcast skies are frequent but counterbalanced by days when clear blue skies are accented with yellow sunlight that reflects the fall leaves and warms the spirit.

Those who fly in the winter months generally count the experience with mixed feelings. Cold toes and fingers are a certainty. So are hard-to-start engines and batteries that lack enthusiasm. But once the engine finally fires and the first BTUs of heat start filtering into the frosty cabin air, the whole experience can bring a smile to the face of the most determined pessimist.

The brakes may be stiff but they still work. Once you get to the run-up area, most of the breath-laden frost has cleared from the windscreen and you can stow the gloves. The sun streaming into the cabin does as much to warm things as the manifold heater. On lift-off, the rewards of winter flying come back to remind you why you do this in the first place. The prop bites the crisp air with authority. The dense air brings lift with a rush. Like the counter guy at the FBO said, “There’s a lot of lift going on out there today!” Indeed!

Understanding the gas

There are several reasons engines are hard to start in the cold. Parts are machined to operate easily in concert when they are at operating temperature. The further you get from that temperature—either hot or cold—the more interference there will be between interfacing parts. Poorer fitting parts increase internal engine friction.

Air-cooled aircraft engines typically run on SAE 50W oil when at operating temperature. Cold, the oil has the properties of molasses. The oil pump resists rotation. The oil resists being pushed around. The oil that starts out in the oil cooler may still be there when you land. If the surface air is cold, you know the air at altitude will be colder. It is not unusual to find the oil temperature at the bottom of the green arc, if it gets into the green at all. Pity the poor battery that has to coax all this reluctance into motion.

Mixture matters

Another reason cold engines are hard to start is the gas/air mixture is incorrect. The fuel system, whether carbureted or injected, is set up to operate at a given mixture for normal temperature operation, usually fifteen or sixteen parts air to one part gas. Cold cylinder walls condense gas from the mixture, causing the gas that’s left to become lean—far too lean to initiate normal combustion. Accordingly, engines of all types have an enrichment device to compensate when cold. For liquid-cooled land-based engines, a choke in the carb throat or an extra injector enriches the intake air. Both types of systems usually shut off automatically as the cylinder walls warm up, which usually doesn’t take long.

Air-cooled aircraft engines, on the other hand, have a primer. Even when carbureted, they won’t use chokes or have the acceleration pumps that are common for car and truck engines. Many aircraft engines that fire readily on zero or minimal prime on a sunny, warm day won’t even consider firing without prime in winter. If one squirt of prime works in July, it may take four to six in January.

If there is moisture in the first gasp of cold air that gets sucked into the cylinders, it can frost the plug electrodes. If this happens, no amount of priming or cranking (or swearing) will make any difference. The engine won’t fire until the frost is melted or otherwise eliminated.

Raw gas that condenses on the cold cylinder walls gets scraped down into the oil by the beveled oil control ring(s). It will mix perfectly with oil, so there is no good way to get it back out again unless you cook it out with heat and agitation (otherwise known as flying). If it is cold enough at the altitudes you fly, the gas from priming may still be in the oil when you land.

Problem or not?

But does gas in the oil really hurt anything? Hardly. It will cause a lower viscosity, but that may be an asset rather than a problem. There were WWII radial engines operating in the frozen north that were designed to inject gas into the oil before shutting down. The gas thinned the oil so that the engine could be cranked over in the morning with less resistance. After the engine got back to operating temperature, the oil returned to being an SAE 50 or 60W once the gas was distilled back out of the oil…sort of an automatic multi-weight oil before multi-weight oils were invented.

To say we find a lot of gas contamination in winter oil samples would be an understatement. We usually mention it because gas in the oil can show a fuel system problem. But that is rare in aircraft engines. We find a lot of moisture in winter oil samples too, and it goes into the same category as the fuel. Unless your aircraft engine is liquid-cooled, we don’t think the moisture is any more a problem than the gas.

When taking your sample, it’s ideal to have the oil warmed to operating temperature first, though if that’s not possible it’s best to just take the sample cold and not start the engine at all. Starting the engine but not flying it can introduce even more gas into the system. We realize an FBO mechanic won’t have the option of taking your airplane for a couple of turns around the pattern, even if he or she was qualified to do so, before draining the oil. Consequently, we turn up volatile gas and often moisture in your winter samples if you are flying in the cold. It only rarely points to a problem.

By |2024-09-18T14:04:47-04:00July 18, 2023|Aircraft, Articles|Comments Off on Fuel Contamination in Aircraft

Insolubles in Aircraft Oil

Once upon a time I lived in primitive conditions as a soldier in a war zone. We had few amenities, eating our three daily meals from a can. The morning coffee routine wasn’t very refined, either. The cooks worked in a tent. They heated water for coffee in large 15-gallon pans over a gasoline-fired stove. To make coffee they simply dumped tins of ground coffee beans into the boiling water, and after it steeped for a while, the water turned brown. When it appeared to be the right color, the heat was turned down and the churning grounds—at least most of them—settled to the bottom. If you were early when you passed through the chow line, you got a top-of-the-brew serving that wasn’t bad. If you were late and your cuppa joe came from somewhere near the bottom, you could chew it.

We enjoyed the coffee grounds in our coffee as much as your engine enjoys insoluble materials in its oil. These days, there’s usually only one reason I find grounds in my coffee: the coffee filter failed for one reason or another. Usually, one or more of the filter pleats has laid down, letting grounds overflow the rim. But the insolubles in your aircraft’s oil are not quite as simple as the grounds in my Mr. Coffee machine. There are many reasons that insolubles form in an aircraft oil sample.

What are insolubles?

Insolubles are the total solids we find in an oil sample. Insolubles are often caused by oxidation, which is a natural process that occurs when oil is exposed to heat or oxygen (in the air). Oxidation leaves free carbon in the oil when the oxygen molecules combine with hydrogen.

Virgin oil usually doesn’t have any insoluble materials in it. When it occasionally does, the most we normally find is a trace level. The insolubles in virgin oil are from the normal oxidation process of the oil.

At least some of the insolubles in the oil samples we analyze are free carbon particles, which are hard particles that can damage sensitive, close tolerance parts like friction bearings. Keeping insolubles within the normal range is important to most aircraft engine operators wishing to get the longest life possible from their engines.

Measuring insolubles

There are various methods of measuring insolubles in the oil. One is to draw the oil through a very fine filter (½ micron) and then weigh the filter. The filter’s weight gain is reported as a percentage of insoluble materials by weight, compared to the weight of the sample that was drawn through the filter. Another measuring method rates the darkness of the filter patch compared to a standard.

The insolubles test we use at Blackstone is a centrifuge method. A measured volume of oil is mixed with a heated solvent, agitated, and spun at high speed. Insoluble materials collect at the bottom of a tapered glass tube and can then be measured as a percentage of the sample by volume.

We like to see insolubles in piston aircraft engines at or below 0.5 or 0.6% of the sample, depending on the type of engine. Some engines run cleaner than others, so the acceptable range can vary.

As engines age, insolubles in the oil tend to increase. You may think, judging from the gray appearance of used aircraft engine oils, that the insoluble level would be quite high. Actually, the grayness of these samples is from lead in the oil, which easily falls out of suspension in the oil and forms insolubles. Blow-by, fuel system problems, and combustion problems will cause the oil to be black rather than gray. If you observe black oil when you collect the sample, you may have a problem that needs investigating.

Why do I have high insolubles?

The insolubles test is a good measure of how fast the oil is oxidizing and receiving contaminants from blow-by or other engine systems, and how effectively the system’s oil filtration is functioning. Any contaminant in the oil will accelerate its tendency to oxidize, so the insolubles test is a good crosscheck when we suspect a contaminant like gas, moisture, or excessive blow-by. Excessive metals in an oil will also increase the oxidation process. So will frequent and/or extreme heat cycles.

If we found high insolubles but no contamination from fuel or blow-by in your oil, and your oil change intervals are normal, we might mention a problem at oil filtration as a possible cause of the insolubles. The oil filter bypass valve may relieve if the filter was becoming restricted. The filter system bypass could also open upon cold starts when the oil is too thick to pass through the filter media, which may be partially restricted. Once the bypass relieves, the filter is effectively out of the system. Insolubles may also be forming because your oil use interval is too long, and the filter can’t keep up.

Insolubles are just one of the tests we provide to determine the condition of your piston aircraft engines and used oils. It’s an important test that helps us gauge the condition of your oil and engine, and helps keep you flying happily for many hours to come!

By |2024-09-18T14:05:35-04:00July 18, 2023|Aircraft, Articles|Comments Off on Insolubles in Aircraft Oil

How Often Should I Change My Oil?

When it comes to the questions we get here at the lab every day, right up there with “What kind of oil should I use?” is “How often should I change my oil?” Continental and Lycoming both have guidelines in place, and generally speaking it’s 50 hours for those with spin-on filters and 25 hours for engines equipped with oil screens. But as you know, way more than calendar time should go into determining how often you should be changing your oil. There’s not just one answer for everyone. The engine manufacturer’s guidelines are better than nothing, but there’s also oil analysis. Guess which method we like best for determining how often you should change the oil?

Inactivity

One of the biggest factors we use in determining how often to change your oil is how active the engine is. We used to say you need to fly ten hours a month to keep corrosion away, but a few years back we realized that people were doing fewer hours than that and still getting decent wear numbers. So we lowered our general threshold to five hours of flying a month as what we consider “active” for an aircraft engine.

The problem is, a lot of people don’t like to admit their beloved aircraft has been inactive. But it’s okay to admit it. We can almost always tell. We even have a little question on the back of the oil slip that says “Any inactivity or problems/suspicions?” Inevitably, someone will pen a big NO in that space when in reality, he or she let the plane sit for eight months, then flew it 10 hours in the span of a month. “No!” they protest. “It hasn’t been inactive! I flew 10 hours this month!”

Inactivity usually shows up as aluminum and iron, from oxides and wear at the pistons and cylinders, though other metals can show up too. Trust me, it’s okay to admit when your engine has been inactive. That’s generally an easier and more fun problem to have than a bona fide mechanical issue. When we suspect corrosion, we almost always recommend cutting back to a shorter oil change. While changing the oil more often doesn’t prevent corrosion from happening, it does allow you to 1) monitor the corrosion to make sure it’s not getting out of hand, and 2) get the metal-laden oil out of the system sooner, so not as much metal gets washed into the oil when you crank over the engine. Abrasive oil causes more wear. Even if you have to change the oil with just two or three hours on it, that’s fine. We’d much rather see that than a fill that sat a year, accumulated 20 hours, and was full of metal.

Metal

Of course, as an oil analysis lab we also look at how much metal your engine is producing. If you’ve seen our reports, you know that we keep a database of all the engines we’ve ever seen. We average their wear and then compare that to your own sample to see what’s reading high, what’s normal, and what’s better than most. We like it when you send along notes. The more you tell us about what’s been happening with the engine lately or any specific conditions that might affect the sample, the better our comments on your sample will be.

An engine that’s making more metal than average will usually need more frequent oil changes. That doesn’t fix a problem, if one exists, but it does help you to monitor it more closely and get the abrasive oil out of the system sooner rather than later.

Contaminants

The main contaminants in aircraft engine samples are fuel, water, and blow-by. Blow-by is hard to avoid ¾ all engines blow by to some extent. You want to see lead holding steady from sample to sample. If it’s increasing, we’ll often recommend shorter oil changes until you can figure out what’s going on.

Water can enter the system just from condensation in the air, though we don’t usually see more than a trace from that. And traces of moisture, while not ideal, probably aren’t going to hurt too much. They might accelerate corrosion if you’re not flying all that much, but usually a trace of moisture won’t cause too many problems. When more than a trace of water is showing up, and it’s showing up in every sample, it can be a sign of something else going on. Often, an incorrectly set-up air/oil separator will cause moisture in the oil. When we’re consistently seeing more water than normal, we’ll often recommend going to a shorter oil change.

Fuel is also a common find in aircraft samples. We recommend taking the sample hot to eliminate any normal traces of fuel and moisture, but sometimes people have to take a cold sample, which results in fuel. And that’s okay. As long as you tell us about it, we’ll take that into account when we write the comments and we probably would not recommend using a shorter oil change just for traces of fuel. You can also get fuel in the oil from excessive priming, and again, as long as it’s not showing up in every sample, this is usually something that does not affect wear and will clear up next time. If, however, we’re seeing a lot of fuel from sample to sample, it can be a sign of something else going on so we would likely recommend a shorter oil change until you can figure out what’s up.

Environment

Where you fly also affects how often you need to change your oil. Inactive engines in a dry place like Arizona can usually get away with keeping the oil in place longer than someone in Michigan or North Carolina. In fact, humidity can cause us to alter our standard less-than-5-hours-is-inactive rule. Someone in Georgia may be flying 8 to 10 hours a month and still getting signs of corrosion and need to change more often than someone with the same engine near a desert.

Acids

There’s a lot of talk out there about needing to change the oil more often due to acid build-up in the oil, and we’d say that’s a load of hogwash. In fact we did an article on that topic for our last newsletter. Basically we ran total acid tests on a whole slew of aircraft samples and only three out of 63 samples had a TAN (Total Acid Number) over 2.0. And 2.0 is still a low reading ¾ we consider anything above ~4.0 to be acidic. Never say never, but I predict pigs will be flying before we’ll tell you to change your aircraft oil because it’s getting too acidic.

What about the oil?

Notice what we have not said we take into account: the brand you’re using and whether it’s straight-weight or multi-grade oil. When Jim started this company back in 1985 he came up with a line he liked to use: Oil is oil. We still stand by that today. The oil guys would have you believe otherwise, but brand really does not seem to make a difference in how your engine wears, or how often you can change your oil.

Well, okay, if you’re using Joe Bob’s Oil that he “recycled” in the back of the hangar from emptied-out oil pans that he filtered with a piece of cheesecloth, we might say in that case brand does matter. But as long as you’re using an aircraft-certified aircraft oil, your engine probably isn’t going to care what you use. We like straight weights and we like multi-grade oils. In the end, what you use and how often you change your oil is completely your choice. We’ll give you our recommendation and you can do whatever you want with it. If you want to run longer on the oil despite having high wear, that’s totally fine. And if you have great numbers and you really like changing the oil often, we’re not going to send out the Blackstone henchmen to tell you to start running longer. Keep your own situation in mind and make your informed decision based on what’s showing up in the oil and filter/screen, what the engine monitors are telling you, and your own comfort level. It’s your airplane and your money!

By |2024-09-18T14:06:58-04:00July 18, 2023|Aircraft, Articles|Comments Off on How Often Should I Change My Oil?

The Acidity Question

Every now and then you hear about oil becoming acidic and causing internal corrosion in an aircraft engine. Usually that goes along with the oil absorbing water and then forming acids, but I’ve always disagreed with this statement.

It’s a well-known fact that corrosion is a problem for a lot of aircraft engines that don’t see much use, but is it really acidic oil that’s causing the corrosion, or simply bare metal parts being exposed to the atmosphere? So I decided to run some testing to see what I could find about acidity and aircraft oils.

Now, think back to high school chemistry. Remember learning about acids and bases? Normally with something like water, you measure the pH to determine how acidic or basic a liquid might be. A pH of 7 is neutral, lower than 7 is acidic, while higher than 7 is basic.

The problem with oil is, you can’t run a pH on it directly. So instead, we have the Total Base Number (TBN) and Total Acid Number (TAN) tests.

These are fairly simple tests and the basic principle is this. After you mix a measured amount of oil with some chemicals, you can run a pH on those chemicals. But that doesn’t equate to the TBN or TAN.

To get the TBN you add acid to the chemical mixture until it reaches a pH of 4. To get the TAN, you add a base to the mixture (in this case, potassium hydroxide) until the pH reaches 10. (You might wonder why we don’t just report the pH of the chemical mixture and have that be the end of it, and the answer to that is unknown, at least to me.)

The TBN test

The TBN test is commonly done on automotive oils, but not aircraft oil. That’s because the TBN always reads 0 or close to it with aircraft oil.

Automotive oil has a lot of additive packed in there and that is what the TBN reading is based on. That additive makes the TBN increase. Oil salesmen use the TBN test to help sell their oil, with the idea being that the higher the TBN, the better the oil. But the TBN is really just a testament to how much additive the oil starts with, not necessarily how well the oil will work in any given engine.

You might wonder why aircraft oil doesn’t use the same additives? It’s because the additives used in automotive oils aren’t ashless. The additives present in all aircraft oils have to be ashless, meaning when the oil burns nothing is left. This is why it’s a bad idea to use anything other than aircraft oil in your aircraft engine.

The TAN test

The TAN test is commonly done on industrial oil like hydraulic fluid. There is a theory that when oil becomes acidic it will accelerate wear and cause all kinds of problems, but that’s just a theory — and a pretty weak one in my book.

When most people think of acid, they might think of something like acid reflux and heartburn. Or maybe sulfuric acid burning a hole in their clothes, but that gives acids a bad rap. If it weren’t for acid, your food wouldn’t get digested and we’d be without a lot of very important chemical compounds. What’s more, there is no known correlation between acidic oil and higher wear that I know of.

It is commonly talked about that water in oil will cause it to become acidic, and maybe it will if the water has something to react to. But with aircraft oil, it doesn’t. The additives present aren’t sulfur-based like they are with automotive oils, so when water gets into oil, it usually just stays there until the oil gets hot enough to cook it back out.

Testing the theory

So for this newsletter article, I decided to run some TAN tests on various aircraft oils and see what shows up. Virgin aircraft oils usually have a TAN in the range of 0.4 to 0.8. It’s important to know where the TAN starts out, so you know how acidic the oil has become after use. (You’d think that oil starts out with a TAN of 0.0, but usually it does not.)

For the used oil data, we tested the TAN on 63 random aircraft samples.

Acid Chart

The average TAN reading for those samples was 1.3. That might seem like a fairly large increase, but in the oil analysis world, 1.3 is considered a low acidity reading for any type of system. A reading of 3.0 shows some acidity and anything over 4.0 can be considered fairly acidic.

The highest TAN reading we found was 2.3, but in our testing any readings over 2.0 were rare. In fact, only three samples read higher than 2.0 and none of those had water present, but two were considered inactive. Five of the samples we tested did have a trace of water present, but their average TAN was just 1.1, so we didn’t find any correlation between water and a high TAN.

Acid Chart 2

So how about inactive engines? Two samples that were inactive did have a TAN of over 2.0, but they were the exception, not the rule. We had 11 samples in our test run that were considered inactive, but the average TAN of those was just 1.2.

Based on this testing, it doesn’t look like oil acidity is really a factor at all. Does that mean you shouldn’t worry about inactivity? No — we’ve seen too many examples of poor wear from inactive engines to say that’s not a problem. What it does mean is that in our opinion you don’t need to worry about your oil being acidic. And in life, one less thing to worry about is a good thing!

By |2024-09-18T14:08:24-04:00July 18, 2023|Aircraft, Articles, Gas/Diesel Engine, Marine|Comments Off on The Acidity Question

Building an RV-12 (Part 3)

Since my last newsletter about building the Van’s RV-12, my wife and I have made quite a bit of progress. In fact, we’re nearly done. I believe the phrase commonly used in the homebuilt industry is “90% complete, 90% left to go.” But really, we’re getting down to the short strokes though it’s been a long process since we are mainly only able to work on it over the weekends.

Rapid progress…at first

When we started working, the plane was in a garage in Ossian, Indiana, about 15 miles south of Fort Wayne. The tail and wings were mostly done and the fuselage kit (the third of six kits total) was about one-sixth finished. After buying some videos on how to build the RV-12, we got started. I was actually blessed with a whole garage to work in (many thanks to my step-mother Kathy), and plenty of table space. We were also able to bring some parts home to work on in my basement, which was a nice help.

Progress proceeded rapidly when we started in June 2016. The side and bottom skins of the fuselage were installed that summer, and the basic fuselage structure was pretty well completed by November 2016, just in time to crack into the fourth kit, known as the finishing kit.

This name is a bit misleading because we were nowhere near finishing at this point, but that name has a better ring to it than “halfway kit,” or “other stuff you’ll need kit.” Actually, once that kit was done we were getting close to being finished, and by close, I still mean at least a year away at our pace. This kit included parts like the landing gear, canopy, cowling, and control cables.

The finishing kit

The first section of the finishing kit was wing installation, which was exciting. It’s starting to look a little more like an airplane. At that point, we didn’t have the tail on yet and that was by design. It’s a lot easier to walk around the thing without a tail in the way and it didn’t need the tail on until later, when we started stringing the controls for the rudder and horizontal stabilator. I picked up the suggestion while attending a forum at Oshkosh and also learned there that it wasn’t really necessary to complete the sections in order. Things like the rear window installation could be completed after we installed the wiring in the tail section and fuel tank.

The tail was attached shortly after the wings in April of 2017, and the vertical stabilizer and rudder followed shortly afterwards. Next we attacked the bubble canopy, which on an RV-12 hinges forward — similar to what you might find on a Diamond. This task required our first attempt at fiberglass work. You might not think that would be necessary on an aluminum airplane, but it was and it wasn’t the last of the fiberglass work either. The EAA offers training courses for homebuilders on things like sheet metal, fiberglass lay-ups, and electrical wiring to name a few, and I’d highly recommend taking those if you’ve got your sights set on building your own plane.

Installing the landing gear

By the end of 2017, the canopy was on and we were ready to install the landing gear, and this is when we started to outgrow the garage. The problem was that I couldn’t have the vertical stabilizer on and the canopy open with the landing gear on or the canopy would have hit the ceiling. Those items were temporarily removed so we could proceed building, though it became obvious that we would need to move to a larger location soon.

Soon we were on to the avionics, so we still had a lot of work we could do in the garage without a canopy. For the RV-12, Van’s offered two choices of avionics suppliers: Garmin and Avidyne.

We talked with both at Oshkosh, and not seeing a major difference between the two, we chose Garmin due to the fact that I have been flying behind the G1000 for a while now and was pretty comfortable with it. Other than having to do some minor body contortions to get all the wiring installed, that part went fairly smoothly and before long it was time to move.

At this point, most people would head to the airport and work at a hangar, but fortunately, Blackstone has a large heated garage with a high ceiling, so I gave up my parking space in that garage and moved the plane there, as well as my work tables in preparation for the final kit — the engine.

Engine installation

Unlike a lot of other kits available, there was only one choice for engines from Van’s and that was the Rotax 912 ULS. The good news is that this is an excellent choice. We see a lot of samples from that engine and they virtually always look great. The big difference between this and other 100 HP selections is that it has liquid-cooled cylinder heads. With that present, it can run either unleaded fuel or leaded fuel, so now I have the option of buying my own fuel instead of always having to buy airport fuel.

The engine is also equipped with altitude-compensating carburetors, so no mixture adjustments are necessary; one less thing for the pilot to worry about.

The engine was hung on December 21, 2018, a banner day in any airplane’s life. Everyone was excited, things are coming together, we’ll be in the air in no time now.

Well, here it is six months later and we still aren’t ready to fly, but as I said at the start of this article we are getting close. We flipped the master switch last weekend and powered up the avionics for the first time. Nothing caught on fire and the Garmin GX3 started just like it should, so that was another step in the right direction. We’ve rented a hangar at Fort Wayne International and will move it there at the end of the month. From there we’ll install the prop and start the test-flying process.

Time invested

I get asked occasionally how many hours we have in it and I really don’t know. Seems like keeping track of that would just make you depressed. With a project like this you have to just keep plugging away and sooner or later, the end will happen. In our case it’s been later, but the project has been fun and I’m glad my wife and I took it on. Still, I don’t think I’ll tackle another one any time soon. I’ll report back next newsletter, once we’re in the air!

By |2024-09-18T14:08:56-04:00July 18, 2023|Aircraft, Articles|Comments Off on Building an RV-12 (Part 3)

Building an RV-12 (Part 2)

I have been a pilot since 2005, and while I have done a fair amount of flying since that time, I have always rented the planes I have flown. This has both advantages and disadvantages, but for me the advantages have always been greater. Since earning my license, I have never really had any place I needed to fly. I have taken trips to see my in-laws around the Chicago area. I have picked up my Mom from various business trips that she’s taken, and I’ve done a few business flights, but none of these things were consistent enough need to warrant my own plane.

The ownership dream

It’s not that I haven’t been tempted, mind you. Like most pilots, I have my favorite aircraft (Republic SeaBee, Lake LA-4, Cessna Skymaster, to name a few) and have often dreamed of driving to the airport, opening up the hangar, and seeing my own aircraft sitting right there just waiting to be fired up. Having a window in my office doesn’t help either. Looking out on a nice sunny day, I feel a strong pull to stop when I’m doing, head to the airport, and take off, knowing that my airplane will be ready to go. However, obligations to family and business have kept those dreams at bay.

It helps that I can rent possibly the nicest Cessna 172SP in the tri-state area virtually anytime I like, so I can satisfy my flying itch when it needs scratching. I can also say that I have really appreciated not having to deal with the hassles that inevitably go along with ownership, like oil changes, annuals, and the guilt I’d feel when I go three to four months between flying.

Working in the oil analysis business, I can see the problems that develop in aircraft engines when they aren’t flown enough. Still, when you rent an aircraft, you never really know it like you would as an owner. All the little quirks that might identify a particular airplane are lost on me and if something changes in the one I fly, I don’t know if it’s a normal occurrence or possibly a problem.

Enter the RV-12

All of this changed with the unfortunate passing of my father Jim Stark back in November. He was assembling a Van’s RV-12 kit plane at the time of his death. It was always his dream to build an airplane, but until he retired and moved to a different house where he actually had some room to work, building an airplane was never in the cards.

I was the prime motivator in getting him working on an airplane, though I was never really interested in building one myself. If I were to ever get a plane, I would just bite the bullet and buy one, skipping all of the time it takes to assemble once, which can easily stretch out into a multiple-year endeavor. However, when Dad died I suddenly found myself with a half-finished airplane and a bunch of tools I don’t know how to use. So after some discussion with my wife, we decided to jump in and start building.

One of the big factors in this decision was how fun the RV-12 is to fly. I took a demo flight at Oshkosh last summer and decided that this was a plane I could easily get used to. The only downfall was that it only had two seats, so I couldn’t take my wife and kids anywhere at the same time. But I could see that this was a good introduction to aircraft ownership and also fun to build.

The up-side to building your own plane is you will know exactly how it all goes together and you can also do all of your own maintenance, which can be a big time- and money-saver down the road. Plus, depending on how the building goes, I could make a 4-seat RV-10 my next project and then I’d have something the whole family could take somewhere. But that’s getting ahead of myself.

Attacking the learning curve

I have what I consider to be a fairly strong mechanical background, but I’ve never done anything on an aircraft other than fly it. So far, building the RV-12 has been an adventure. The laboratory business is all metric, but I quickly learned that the metric system has no place in the aircraft industry. In fact, in some areas like drill bits, they don’t even use standard measurements, so buying my drill bits at the hardware store is out.

It also appears that deburring parts will be a large part of my life for the next few years. Fortunately my wife is ready and willing to help and will probably be the driving force in getting this project done. Deburring parts is a good place to start, at least until she is strong enough to run the rivet gun (better start hitting the gym, baby!).

its (a tool box and a section of wing), so I bought those and have been trying my hand at running a rivet gun. The results weren’t pretty, but I keep saying to myself that I’ll be more careful when it comes time to actually work on the plane. At least I hope I will.

I also bought a set of DVDs that show exactly how to build the RV-12 step by step. I know this is something Dad wouldn’t have approved of (he never met a set of instructions he didn’t throw away), but I don’t have the advantage of having an A&P license like he did, so I’ll take any help I can get. At this point, I’m just getting started, but with any luck the project will move quickly. Now if you’ll excuse me, I’ve got a fuselage to finish!

By |2024-09-18T14:10:08-04:00July 18, 2023|Aircraft, Articles|Comments Off on Building an RV-12 (Part 2)
Go to Top